With Tessaract Digital Signing, it's easy to generate, prepare, and send a document for digital signing – typically within two minutes or less. If you've got a client or stakeholder on hold, you can even get it all done while they wait! Here's how:
Choosing Your Case
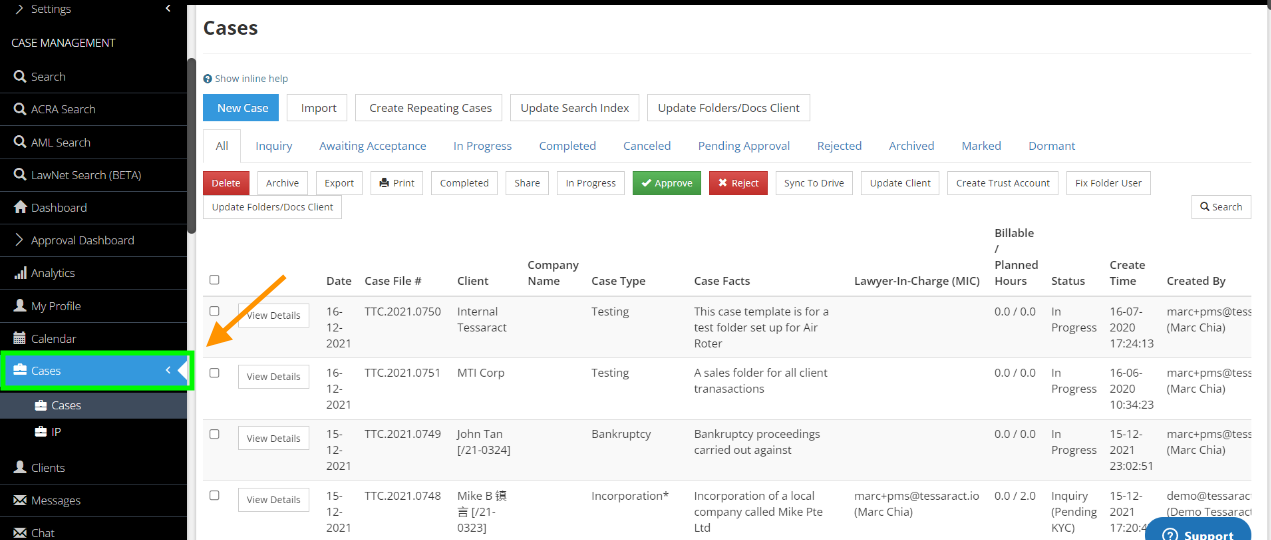
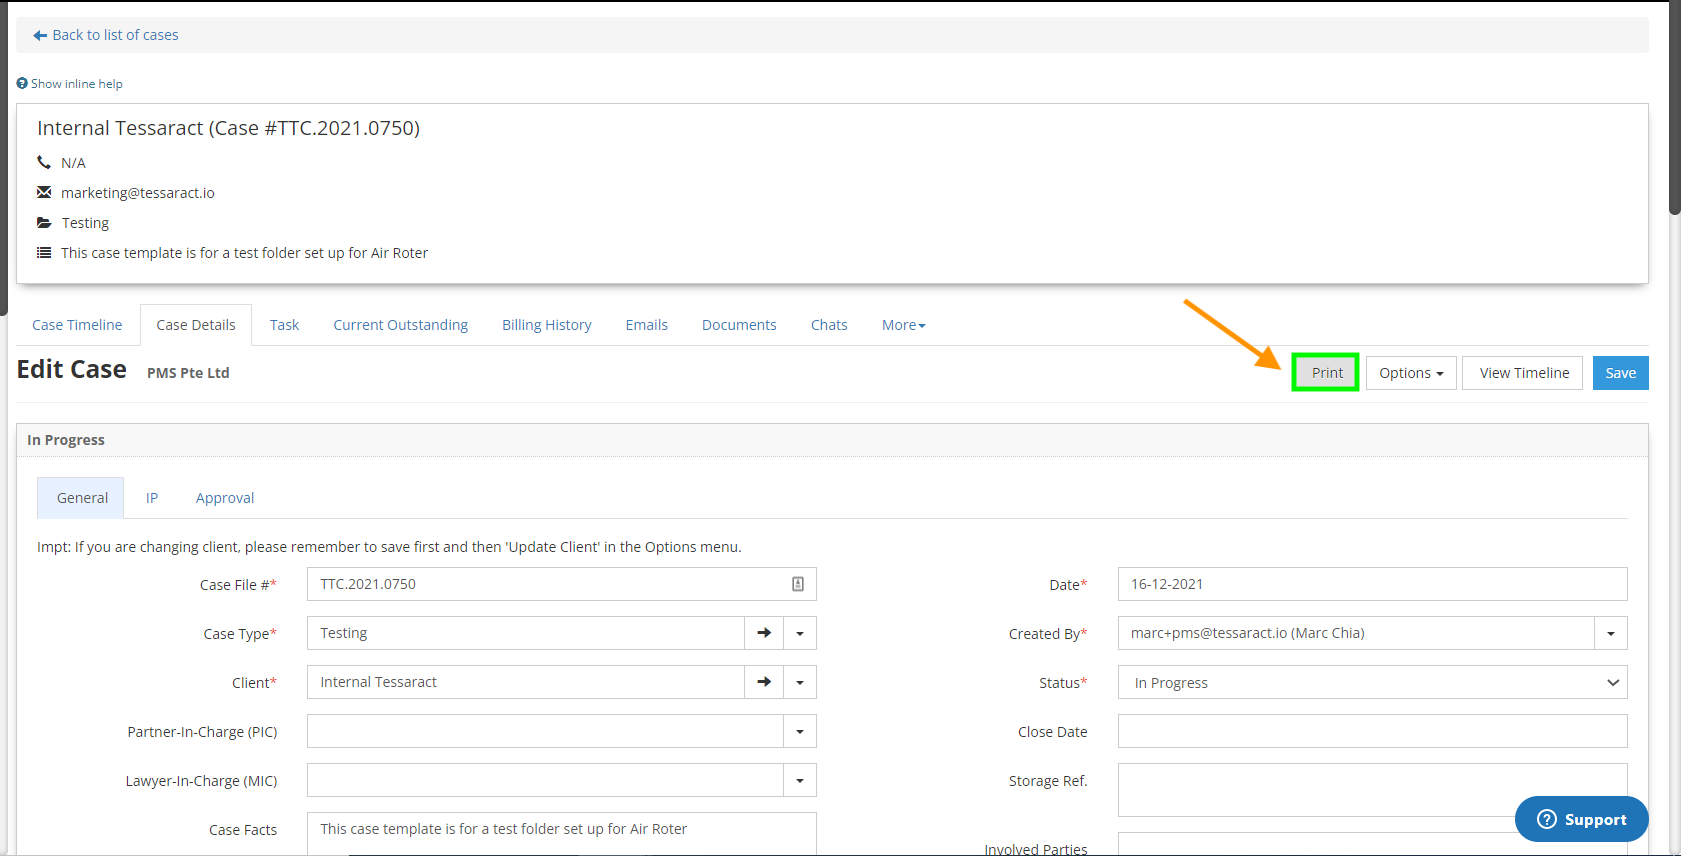
To get started, select the case document you want to print. You'll find it by visiting the Cases menu under the Case Management panel and navigating to the corresponding Edit Case page. Once you've filled out all the relevant fields, just click "Print" to go to the next step.
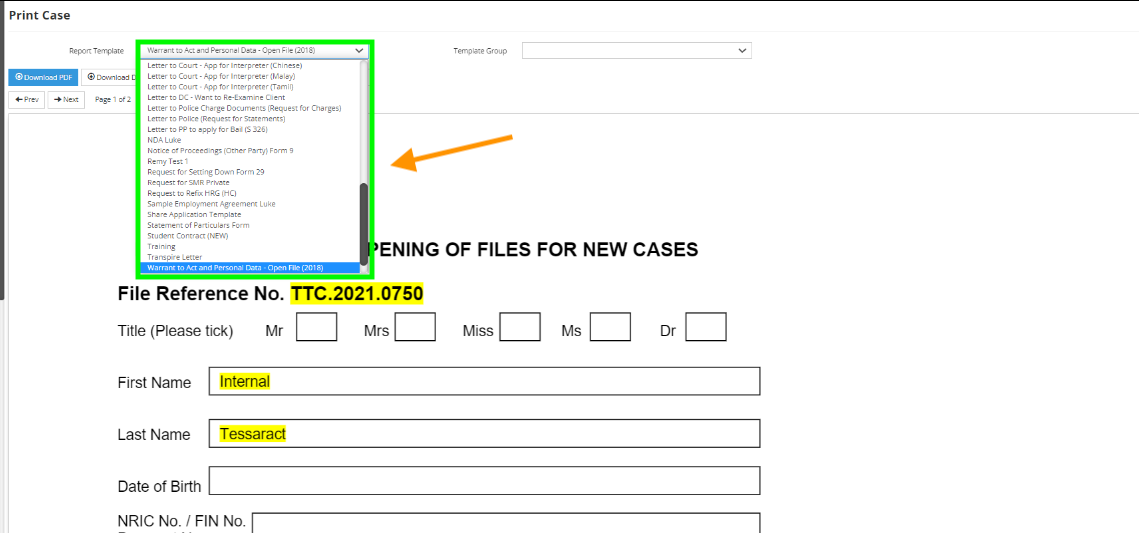
Now take a look at the Report Template dropdown. It lets you choose from your predefined and custom templates to create the relevant filing, letter, inquiry, or other documents. In just a few seconds, the system will populate your chosen template with the data you filled out on the Edit Case page. It'll all be in the correct fields and have the appropriate formatting; you'll only need to make changes if you entered something incorrectly earlier.
Rendering Your Signable PDF Document
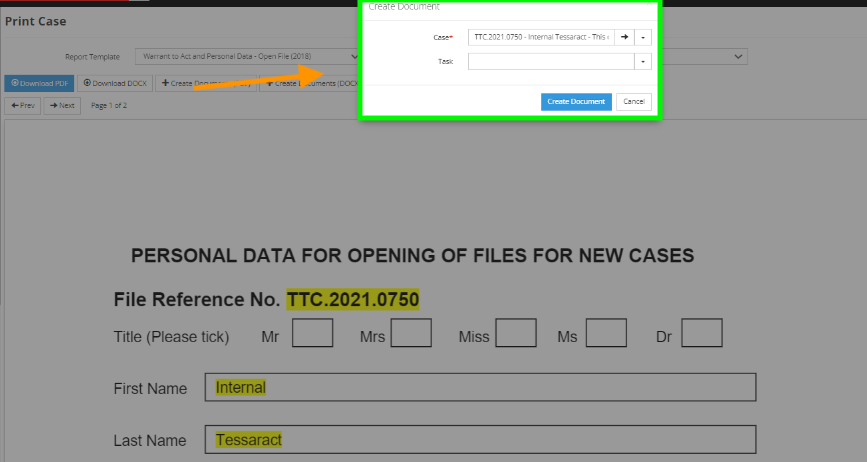
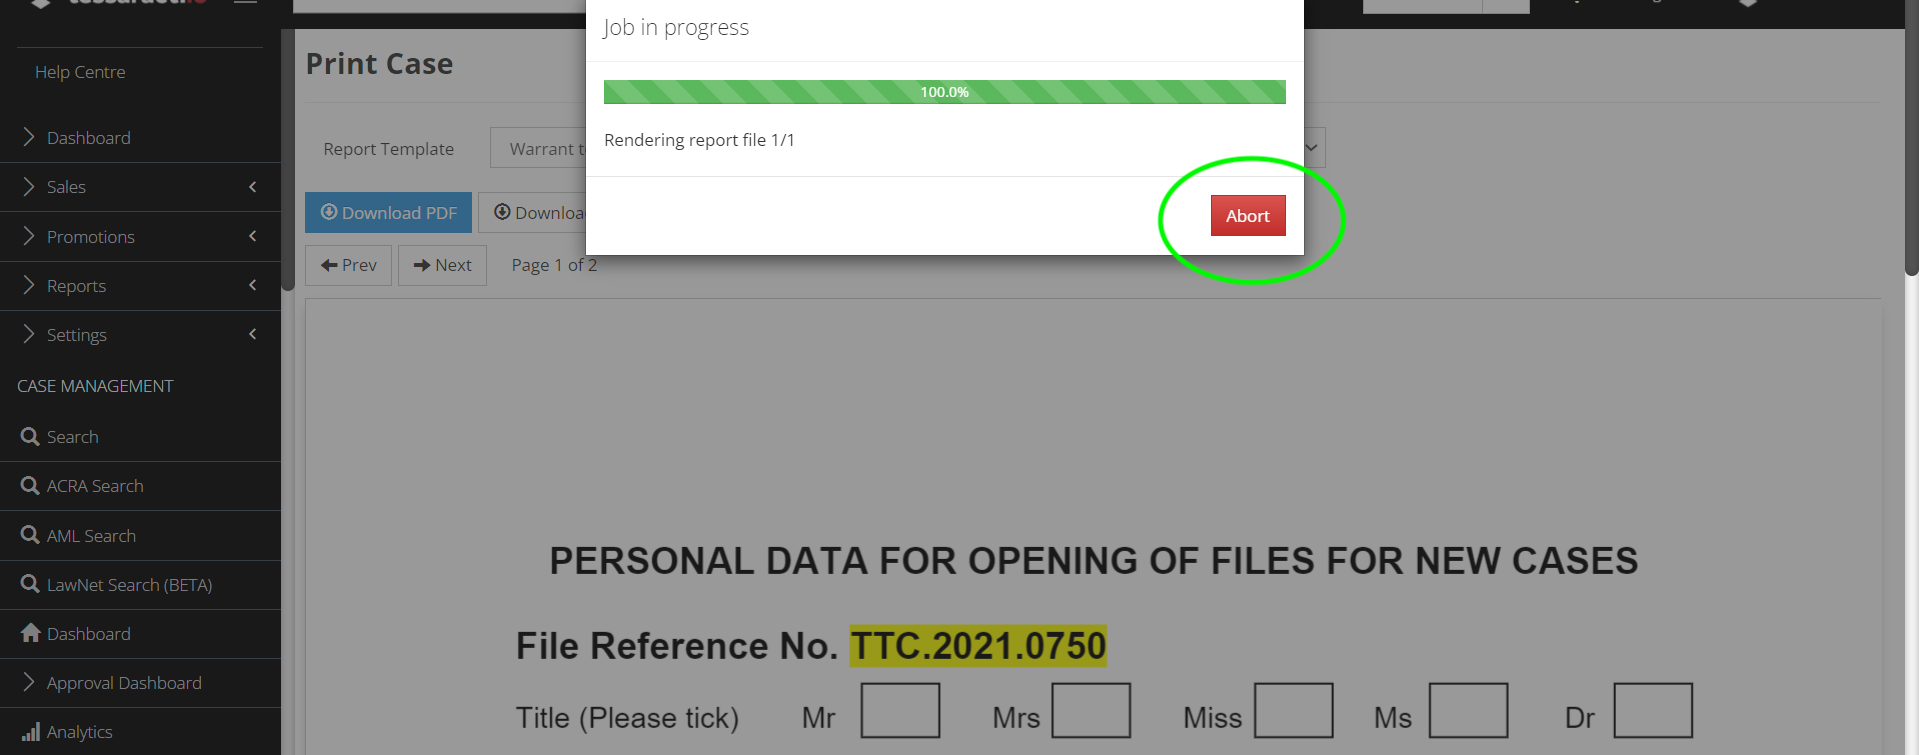
If everything looks correct, click "Create Documents (PDF)". Confirm your choice, and you'll see a progress bar while the PDF file renders. If you still need to make adjustments, you can also "Abort" the process here and go back.
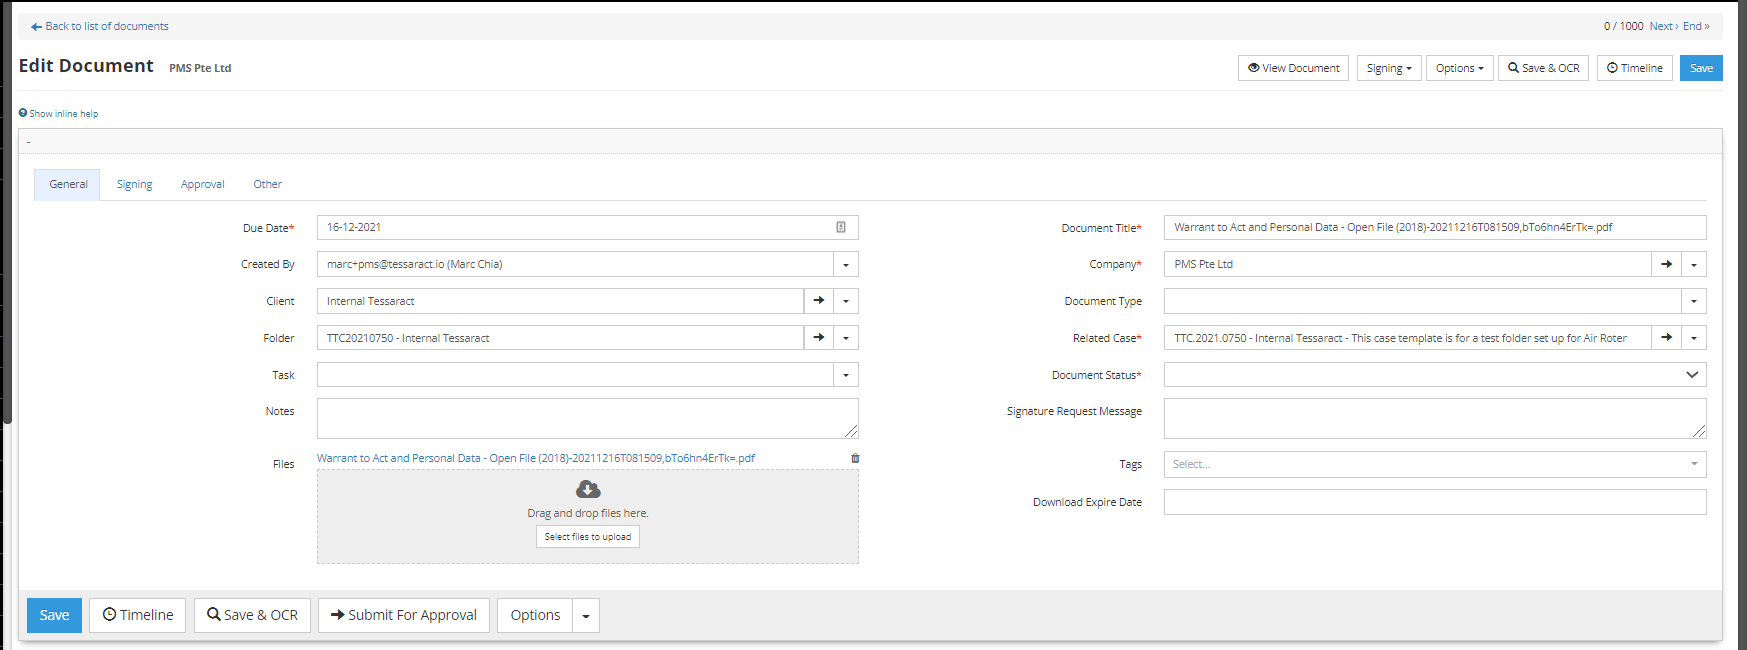
After creating the document, the system will automatically advance to the Edit Document page. Once again, you'll note the system copies all the appropriate information verbatim so that you don't have to worry about transfer mistakes or typos.
Adding Signature Boxes
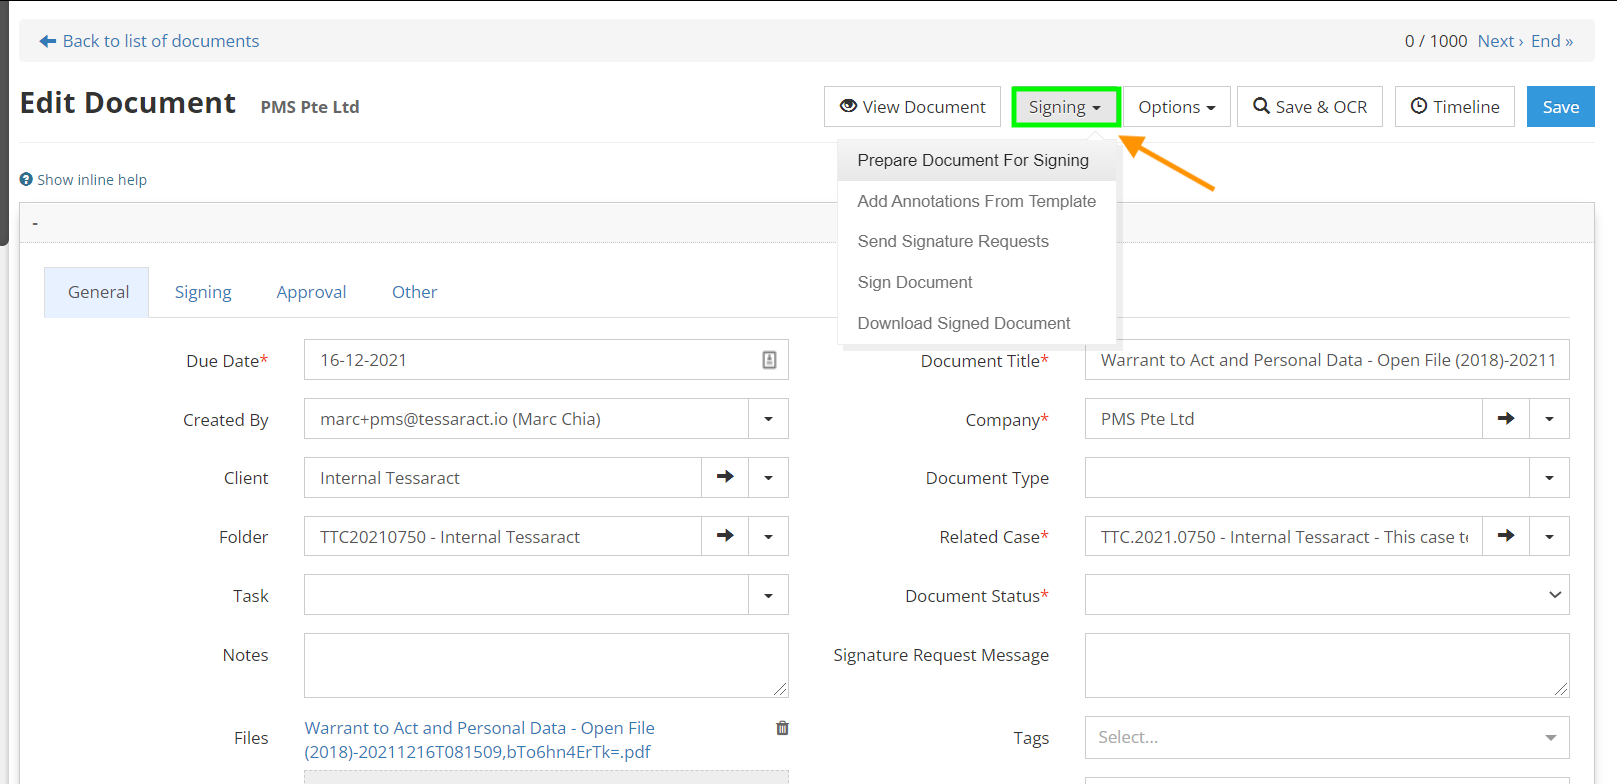
Click the Signing dropdown menu and choose "Prepare Document for Signing." The system will display a PDF preview exactly as your client would see it. From here, you have two convenient ways to choose where the signatures should go:
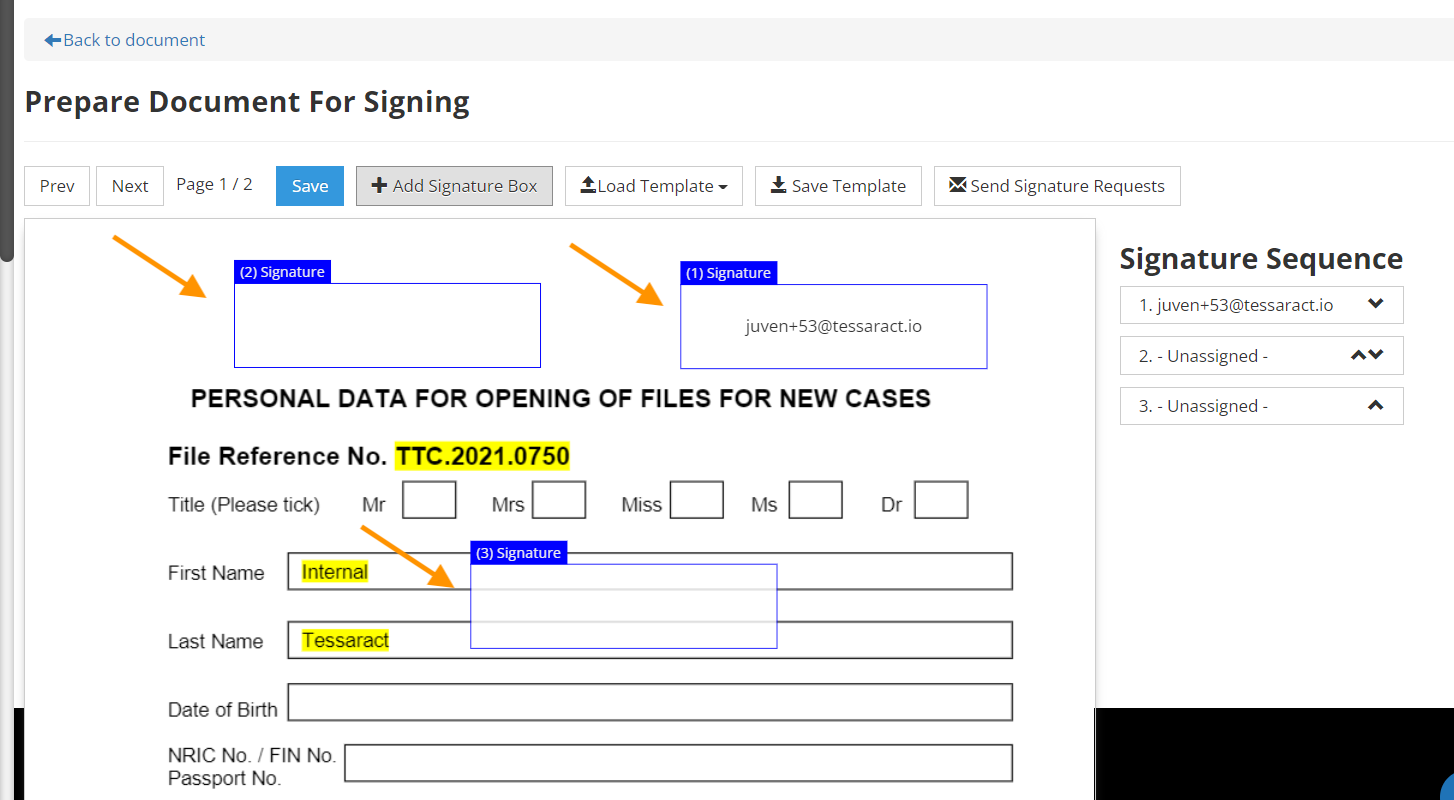
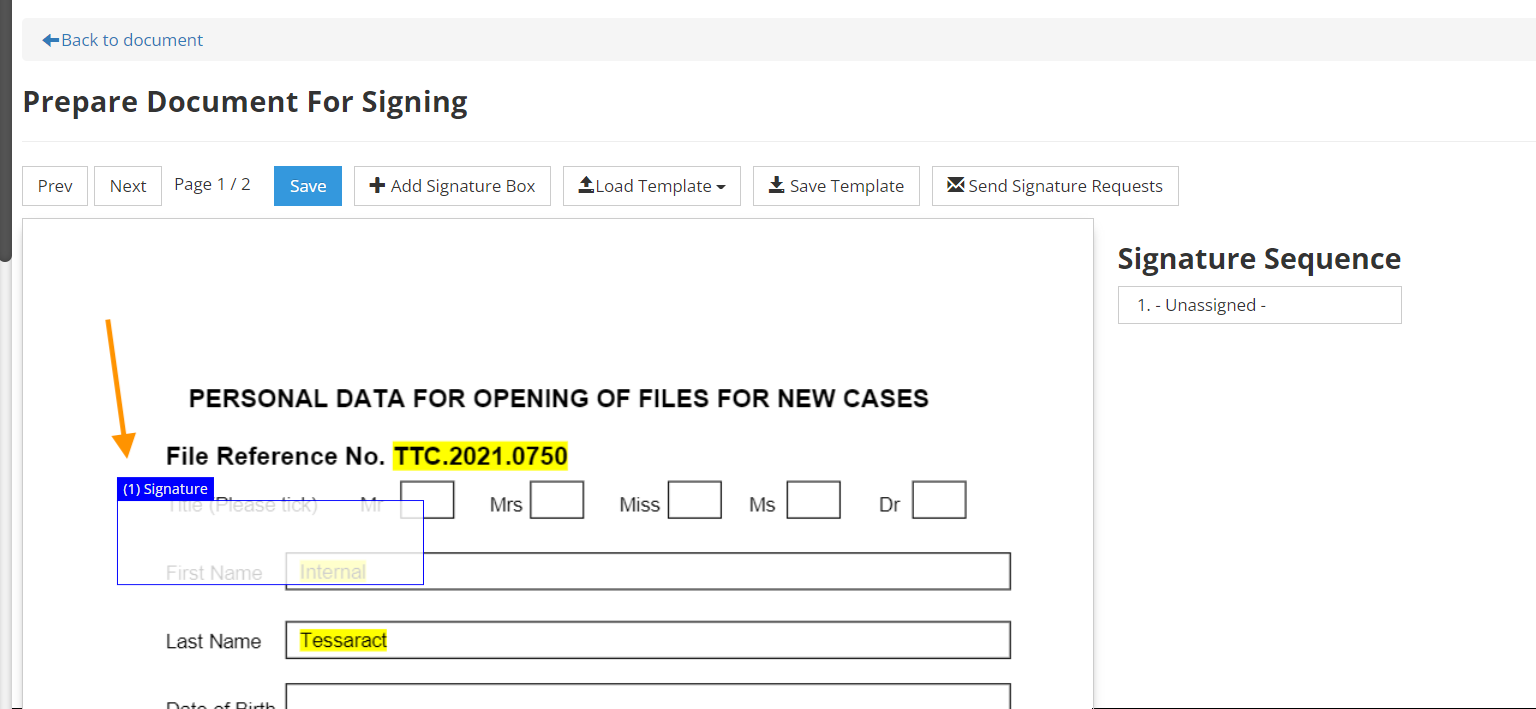
- Click the "Add Signature Box" button to create as many different signature areas as you need. Once you've added a signature box, you can reposition it using your mouse.
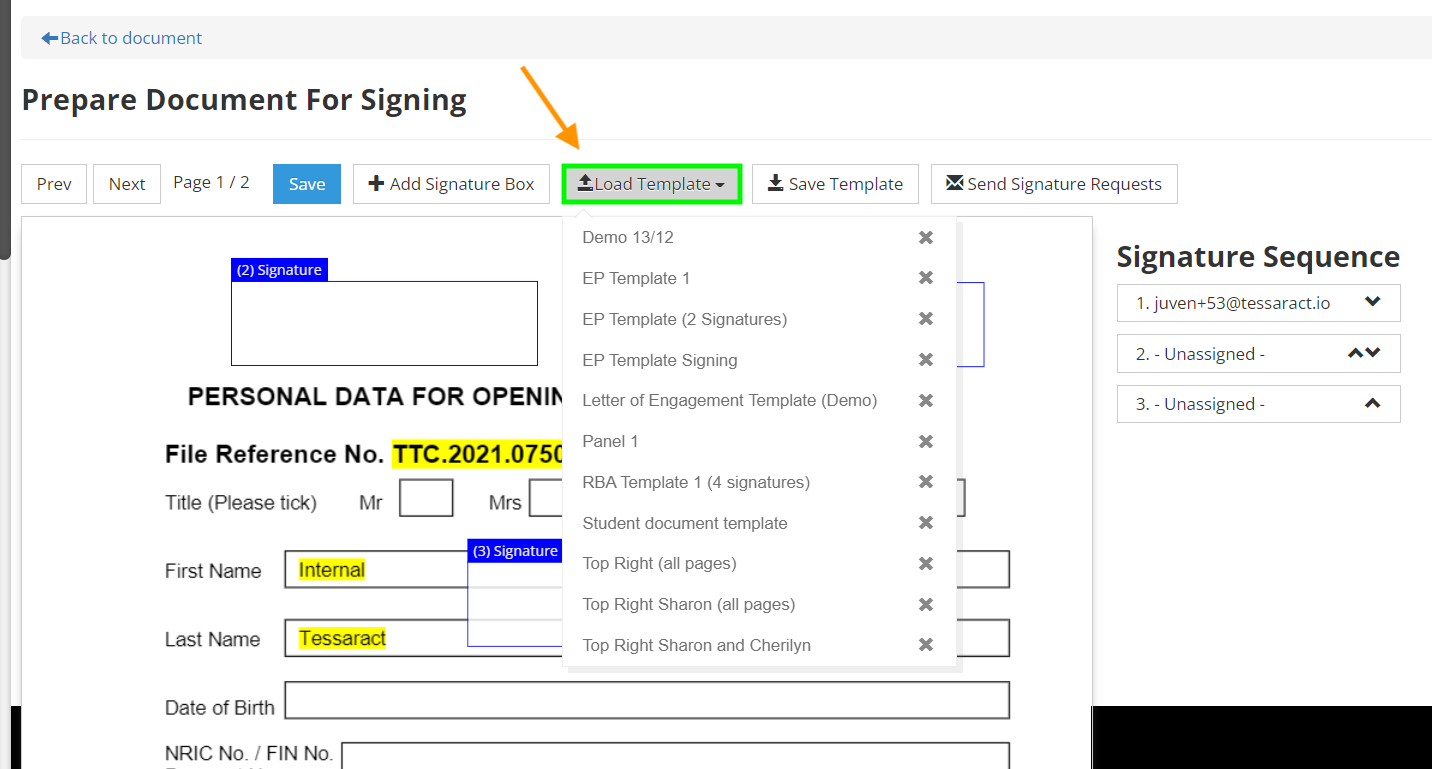
- If you'd prefer to use a template, you can click "Load Template" to insert prepositioned signature boxes. Note that this will remove any signature boxes you've already created.
1. Add Signature Box
2. Load Template
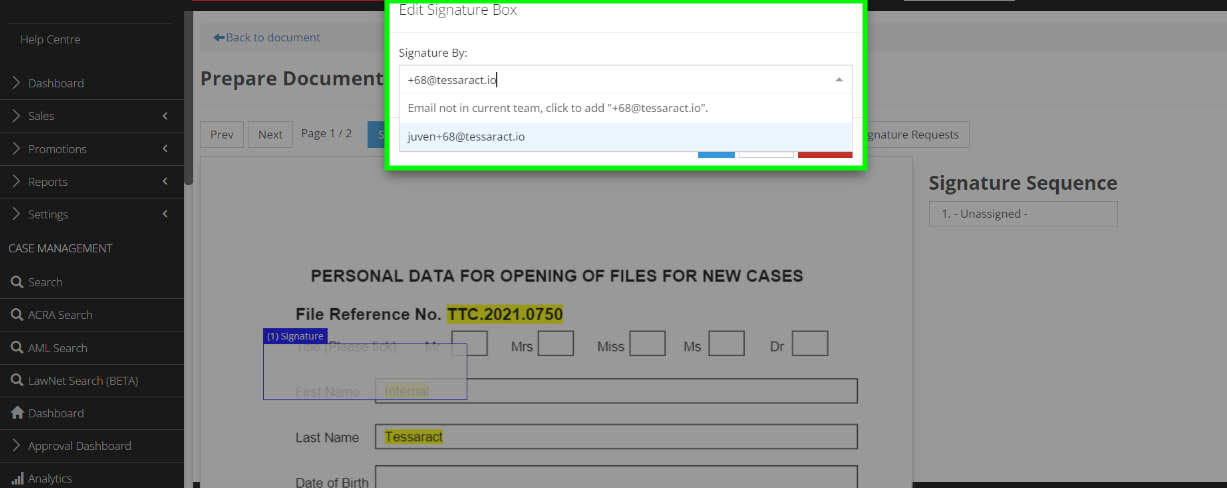
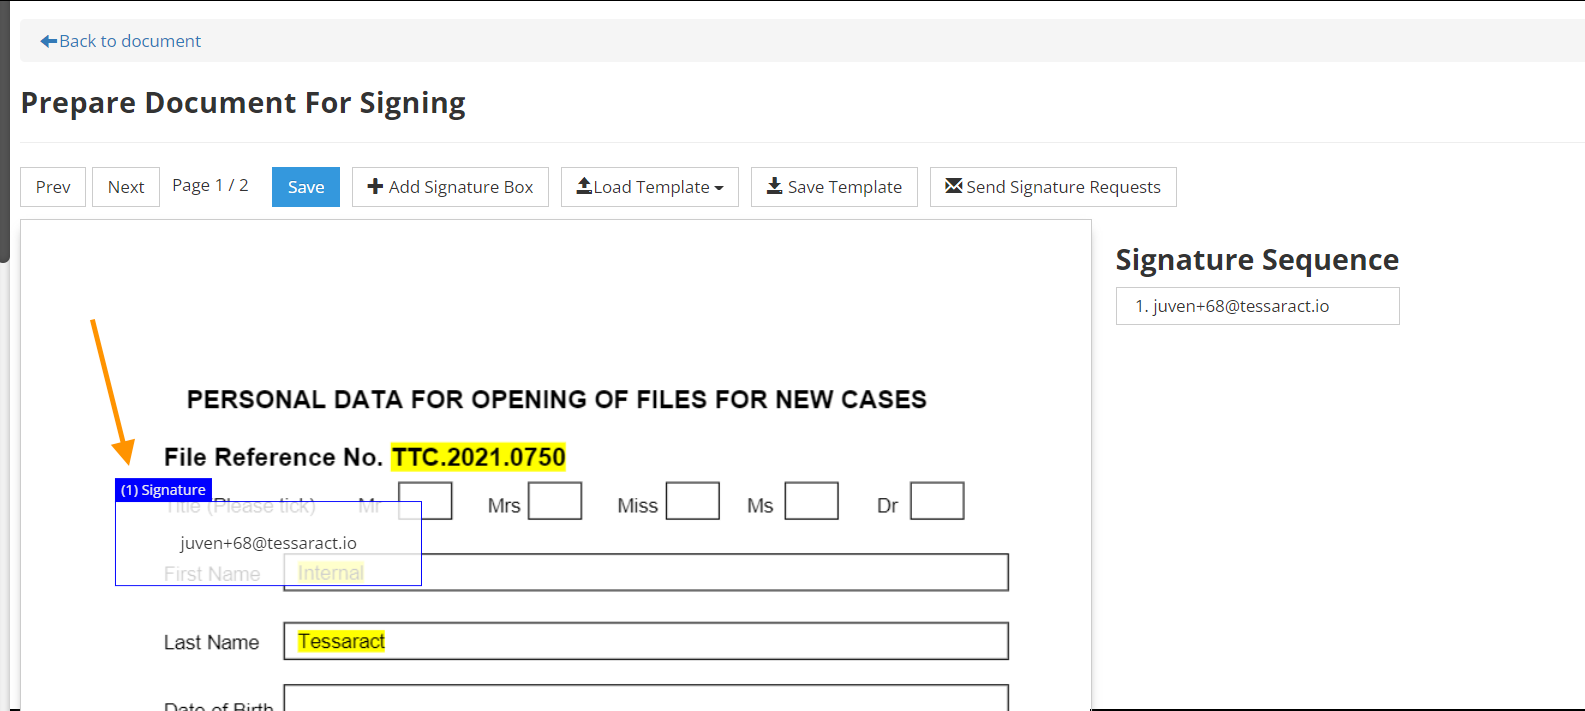
After positioning a signature box, click on its top tab to edit it. In the popup window, assign the signature box to a specific email – this lets the system know which party ought to sign that box and where to send an associated email request. You can choose from predefined email addresses you've already added to the case or type in new ones. Once you've chosen the signer's email address, you'll see it appear in the signature box to keep things clear.
Requesting Signatures or Approvals
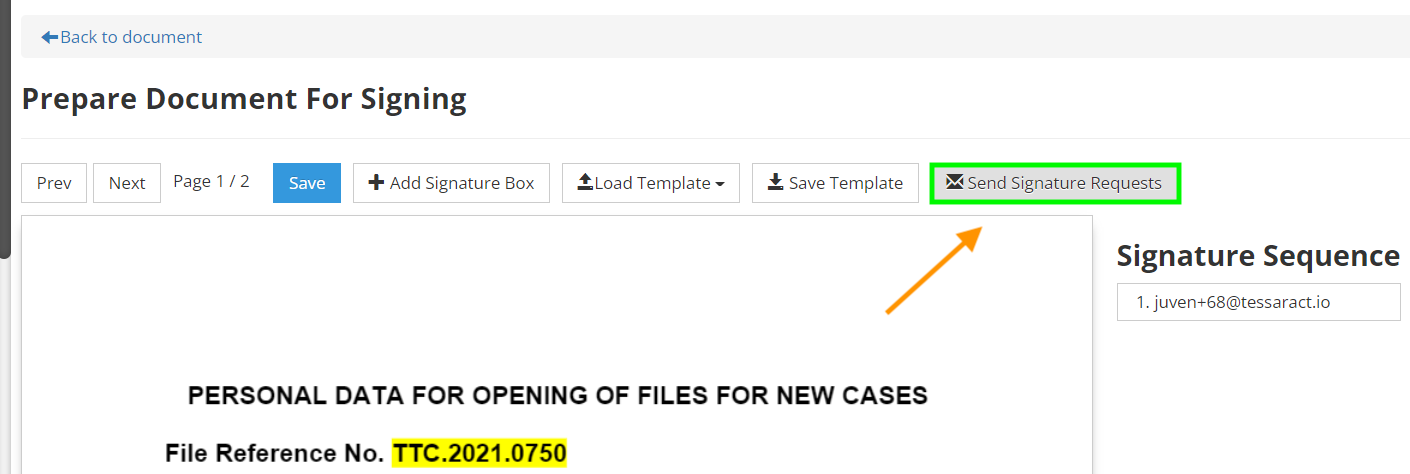
Click the "Send Signature Requests" button at the top of the page. The system will now email all the relevant signatory parties at the addresses you specified. If you need to get the document approved by a managing partner or director before requesting signatures, you can also do so at this stage.
Confirming Your Actions
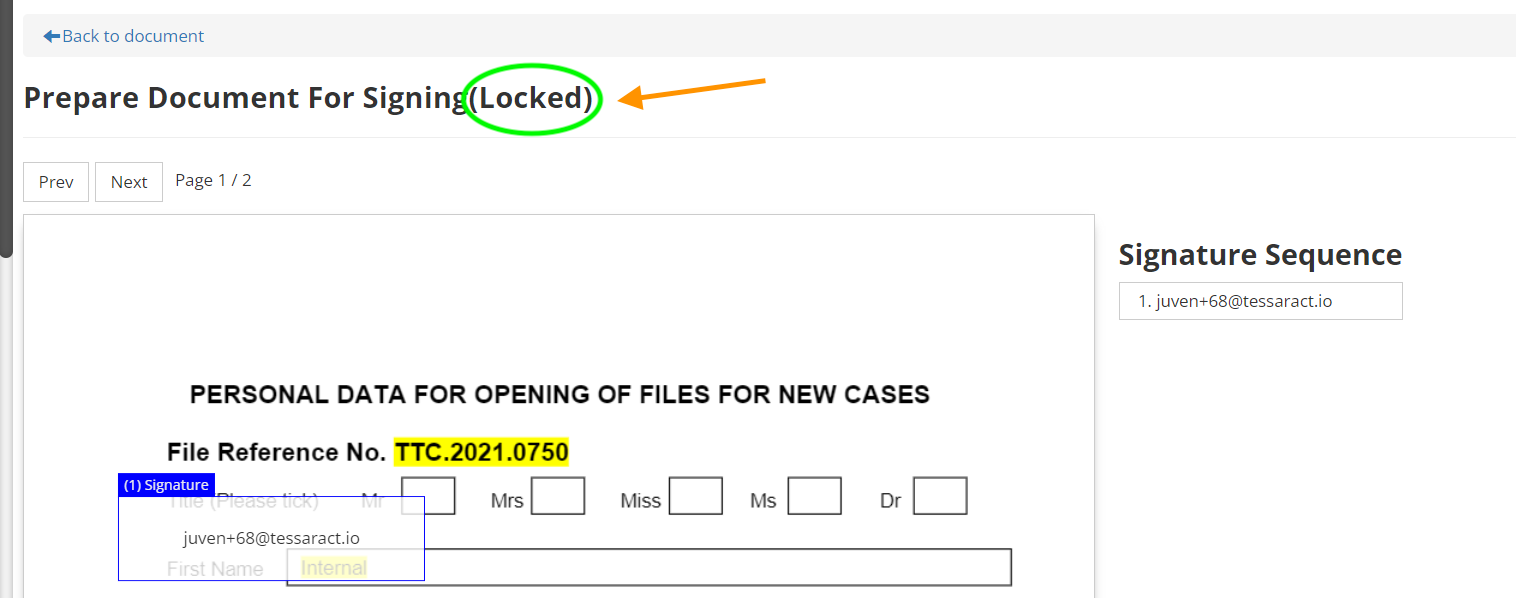
At this point, you'll notice that the title of the page changed to indicate that the document is Locked. This automatic transition makes it simple to avoid work duplication.
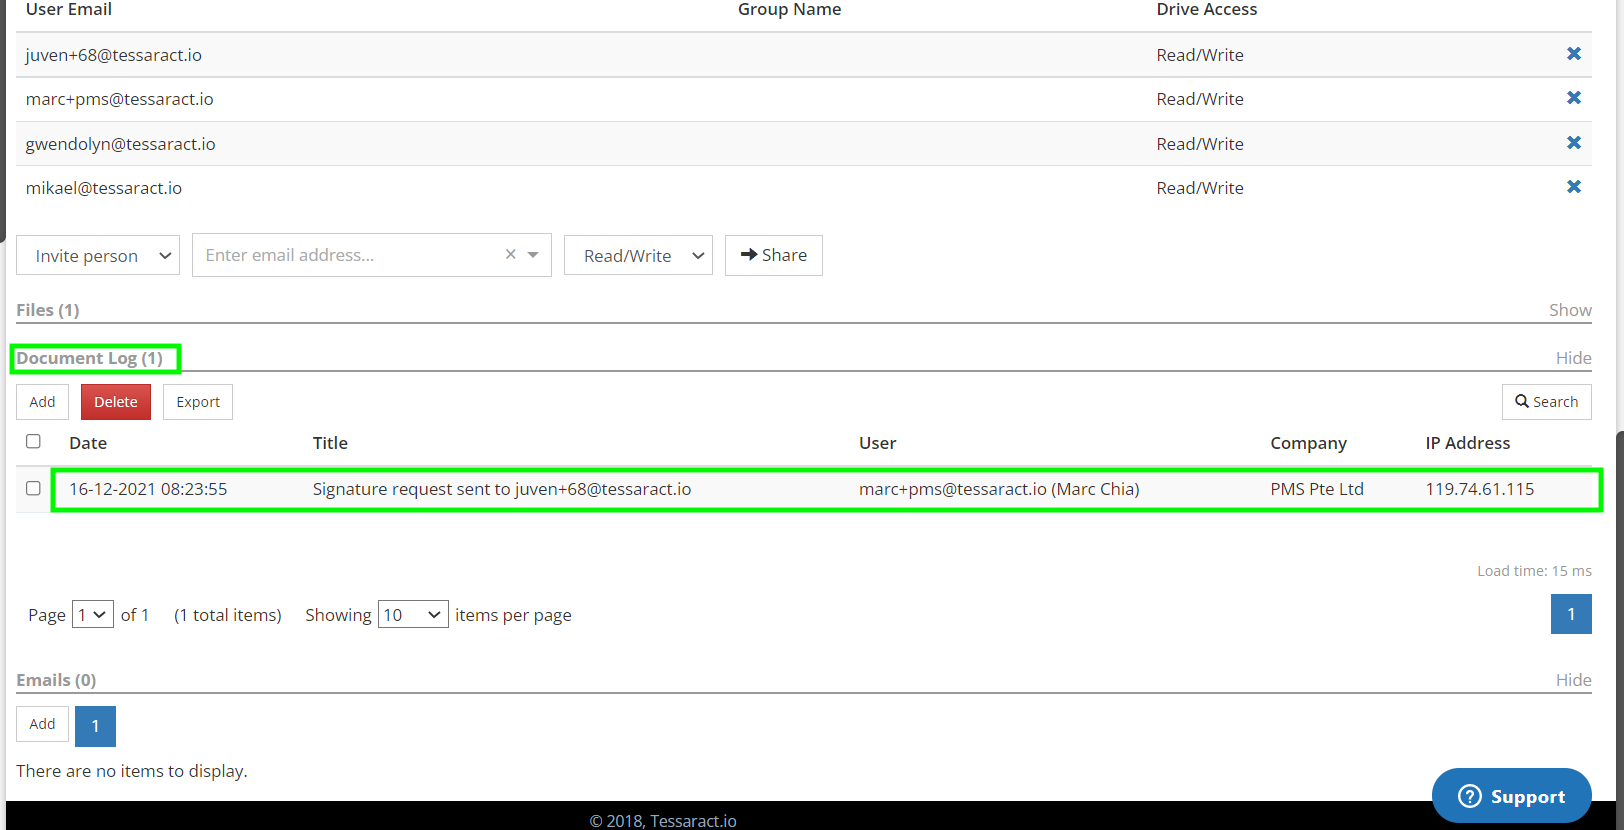
Head back to the Documents view panel and scroll down. The Document Log displays the updated signing request events, and you'll find records of the sent notification messages in the Emails list.
Tessaract Digital Signing
With Tessaract Digital Signing, you can generate documents pre-filled with customer data in just a few clicks, send it for signing and receive the signed copies all on Tessaract. Tracking every stage of the signing process – complete with a digital paper trail – has never been this simple with Tessaract Digital Signing.
Utilising Singpass is another easy and secure method of digitally signing your document. Learn more about how to add your digital signature remotely through Singpass on Tessaract.