Tessaract makes it easy to create, fill out, and sign custom digital forms. A quick, fuss-free way for you to accomplish everything you need to with no hassles.
When we say quick, we mean it: You can create and manage documents, prepare, sign, and save in just two minutes. Tessaract Digital Signing has been designed to maximise efficiency, so you can automate the paperwork and get on with the rest of your job.
Create a custom form to fit your own workflow
When building your custom form, you can include multiple categories, such as investor fields, investor income and net worth profile, and many more.
There are also multiple different field types that you can incorporate, such as dates, drop-down options, character input boxes, and drag-and-drop-file boxes.
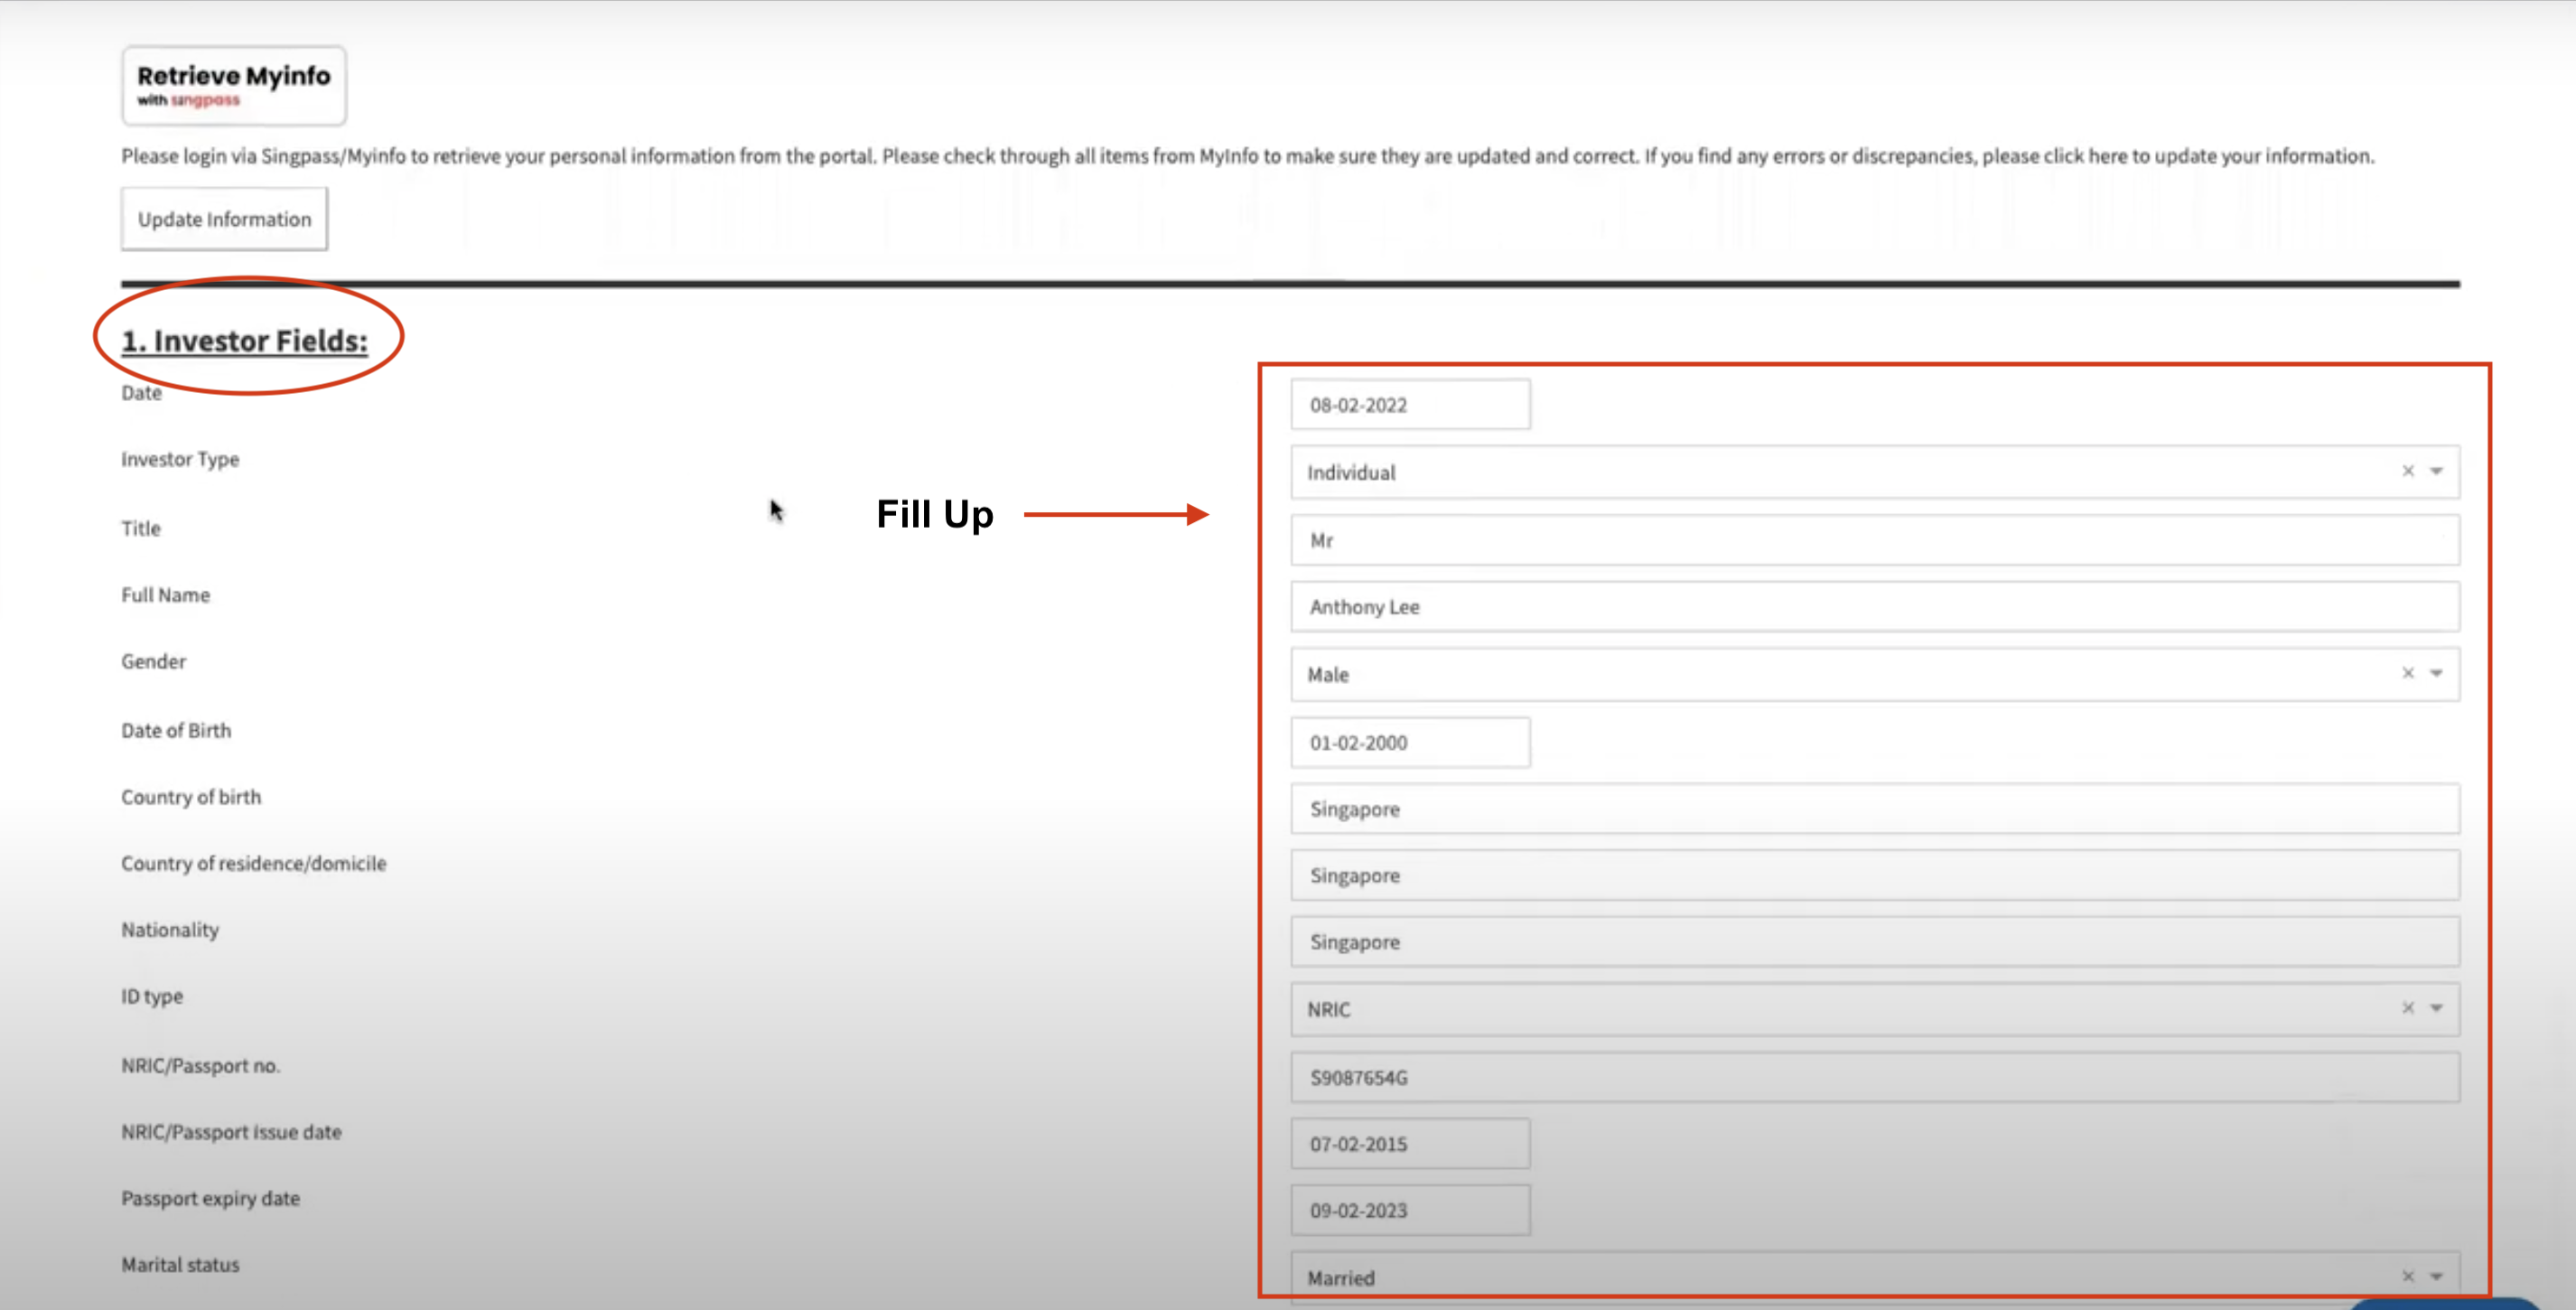
Generate a document based on the fields written in the form
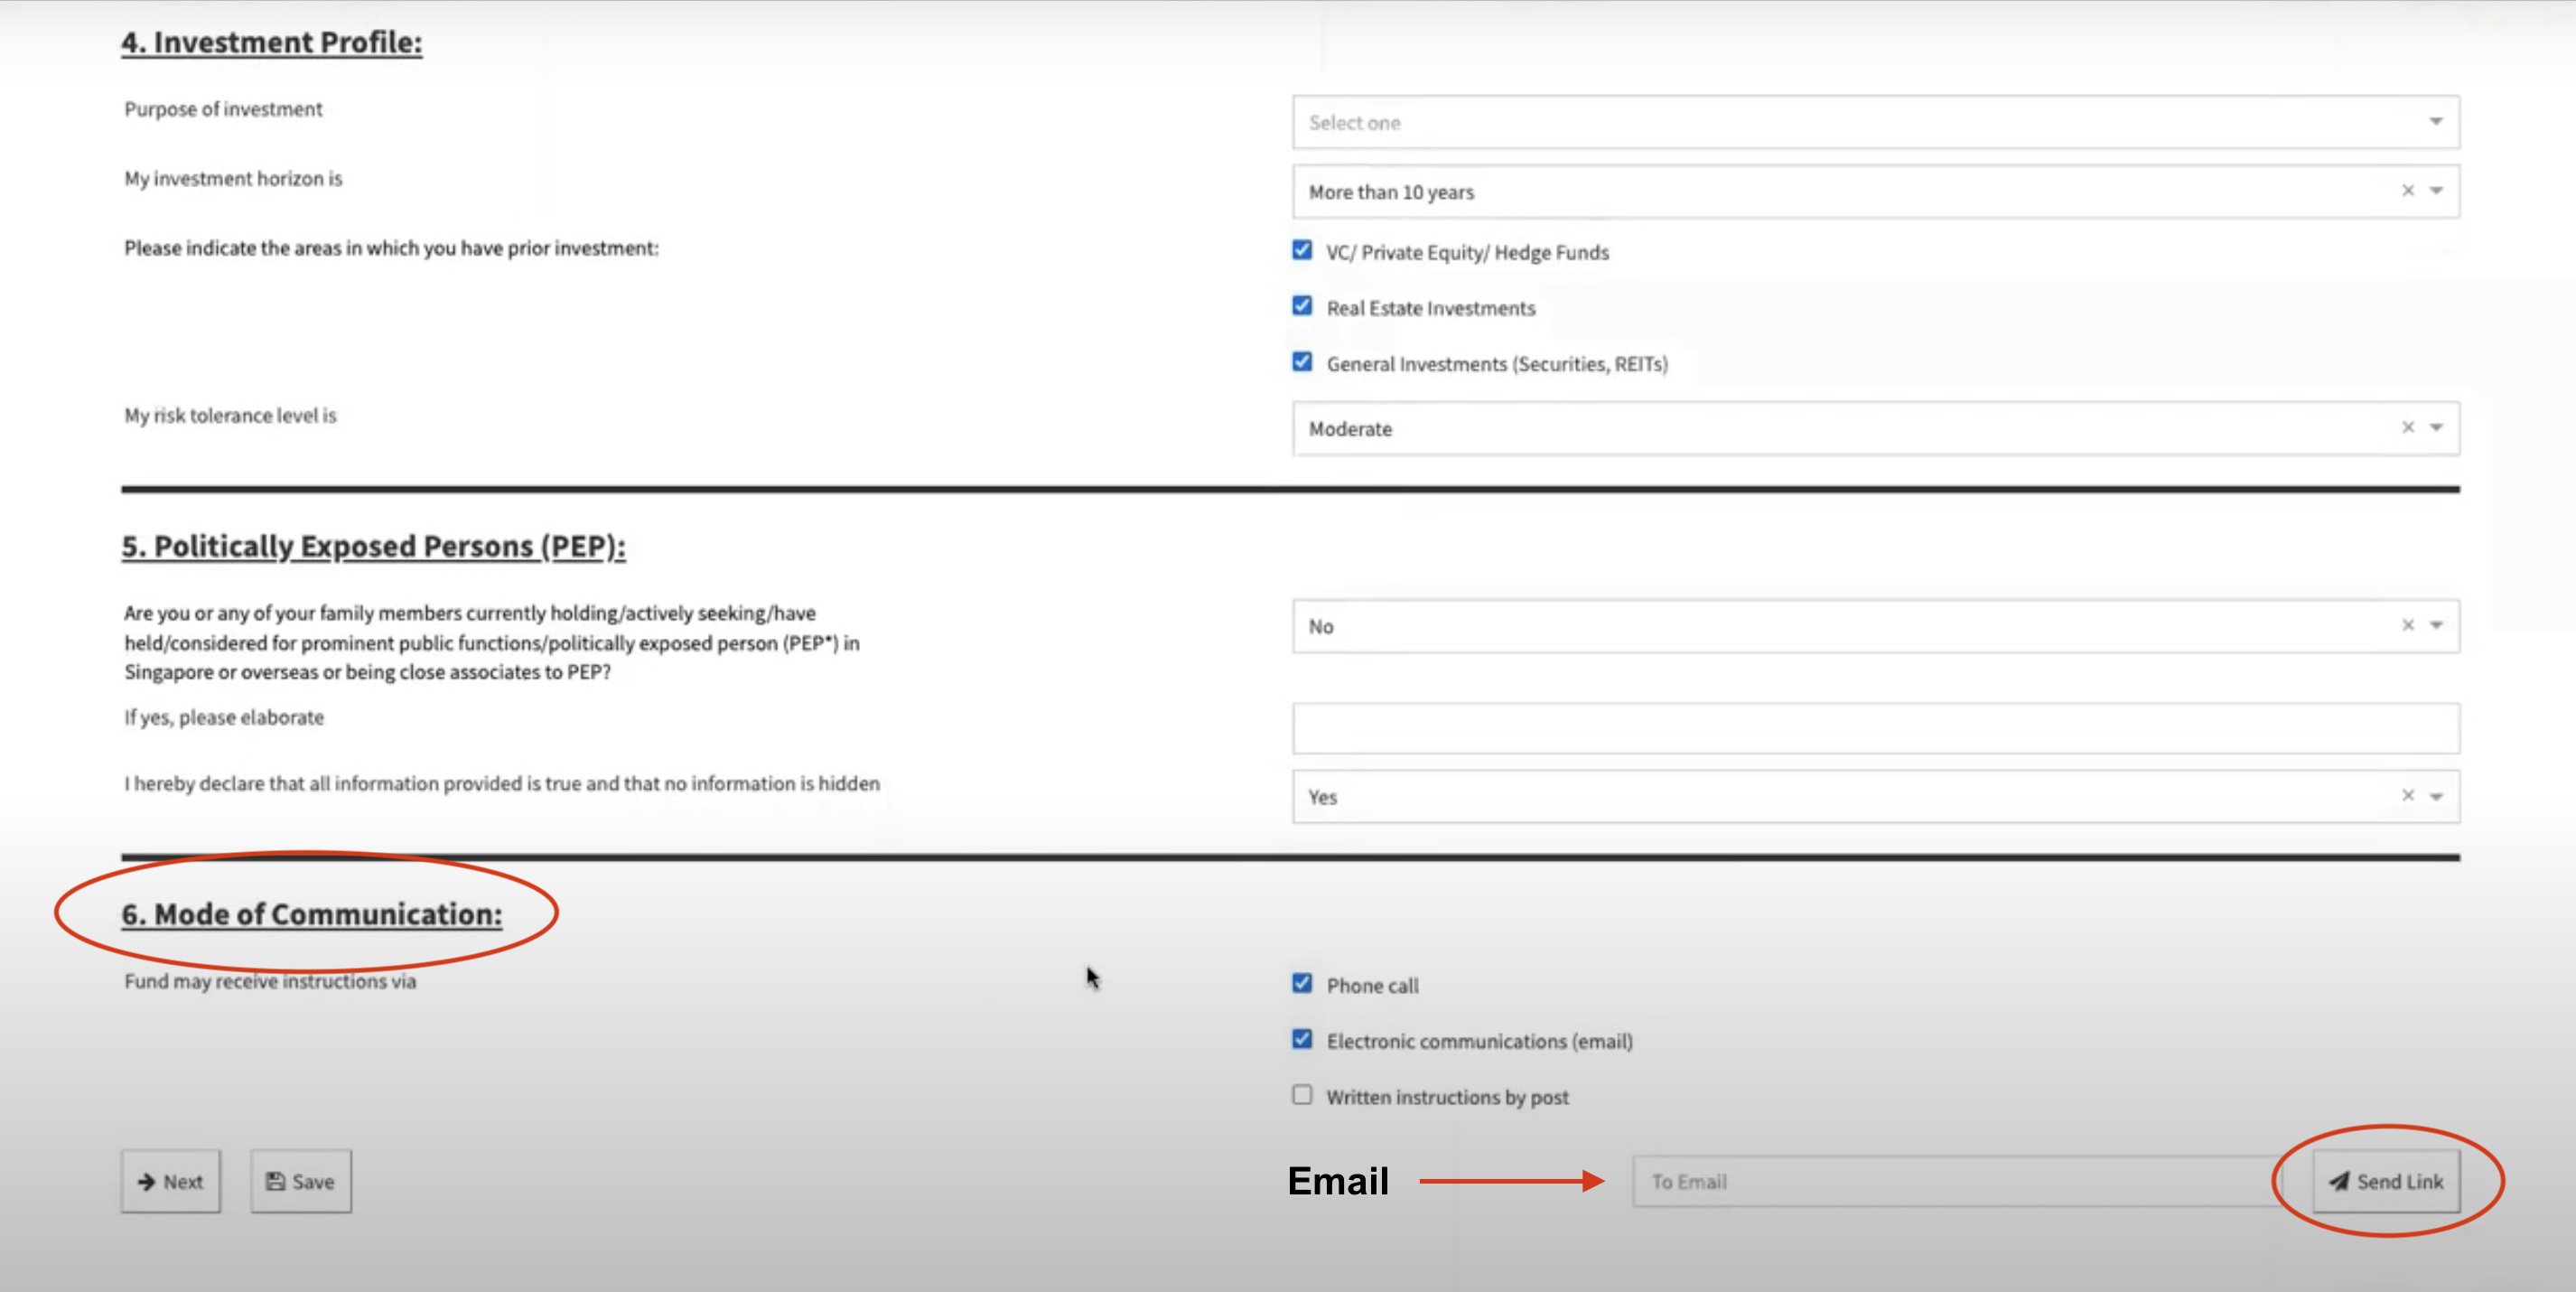
Once you’ve chosen all the fields you’d like in the form, you can either fill in these fields yourself or send them to the person you need to fill them in.
You can do this by entering their email address(es) in the box at the very bottom of the page on the right-hand side and then clicking send link.
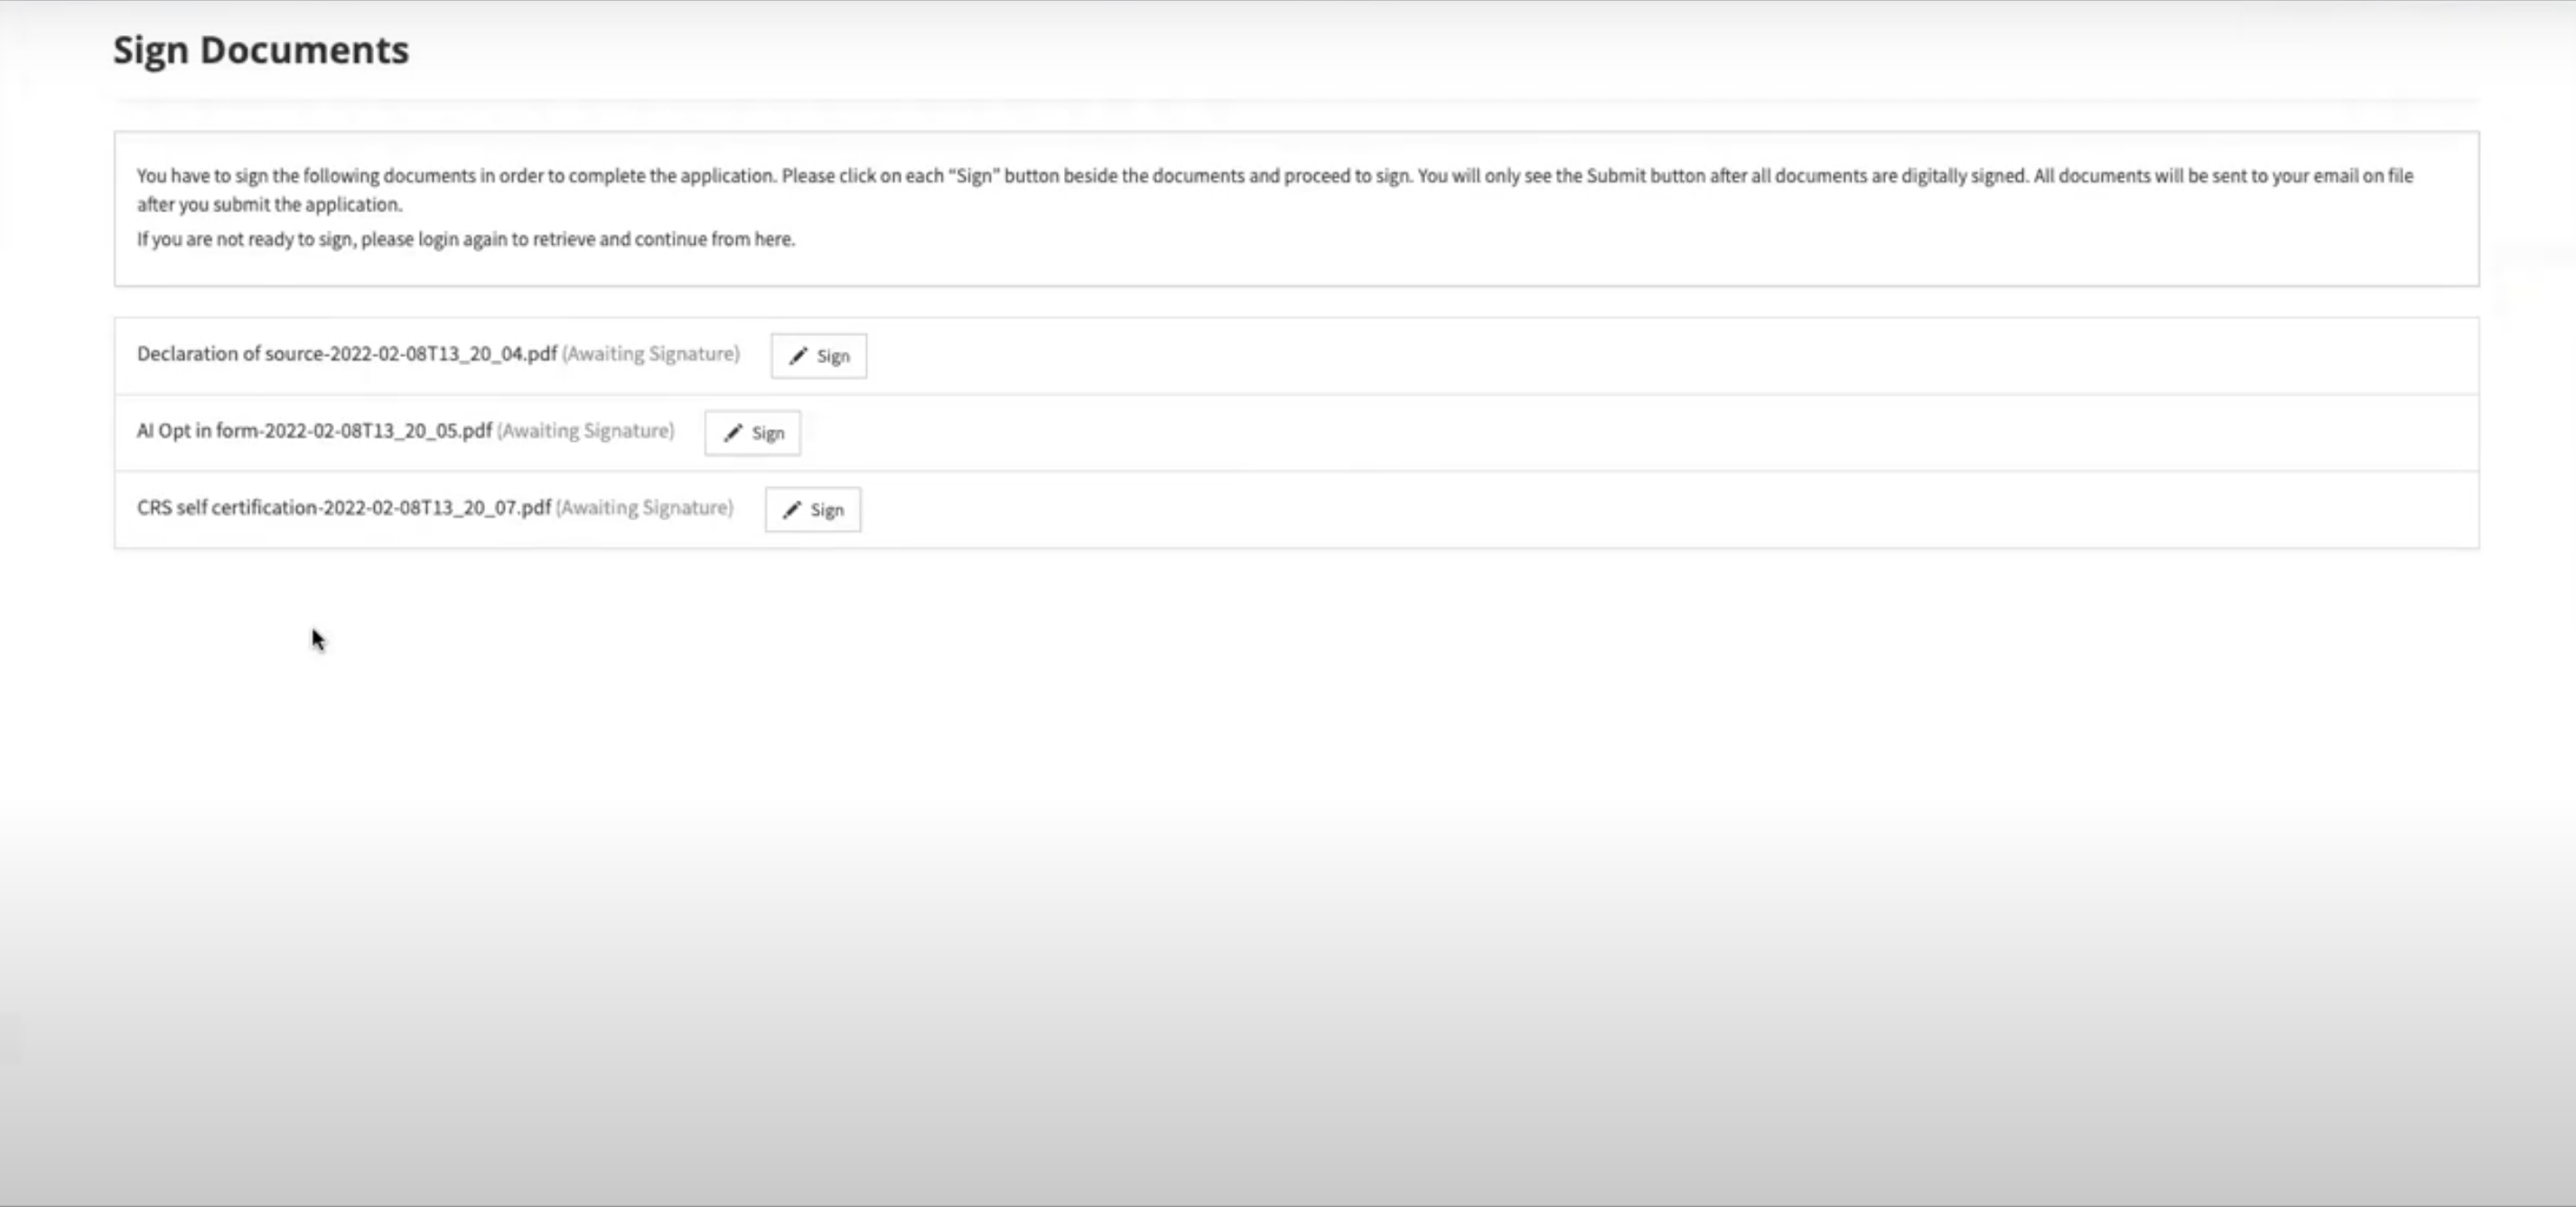
Digitally sign the generated documents.
On the ‘Sign Documents’ page, you’ll be able to view all of the documents that have been generated. These are downloaded documents tokenised to pull in data filled in the earlier forms.
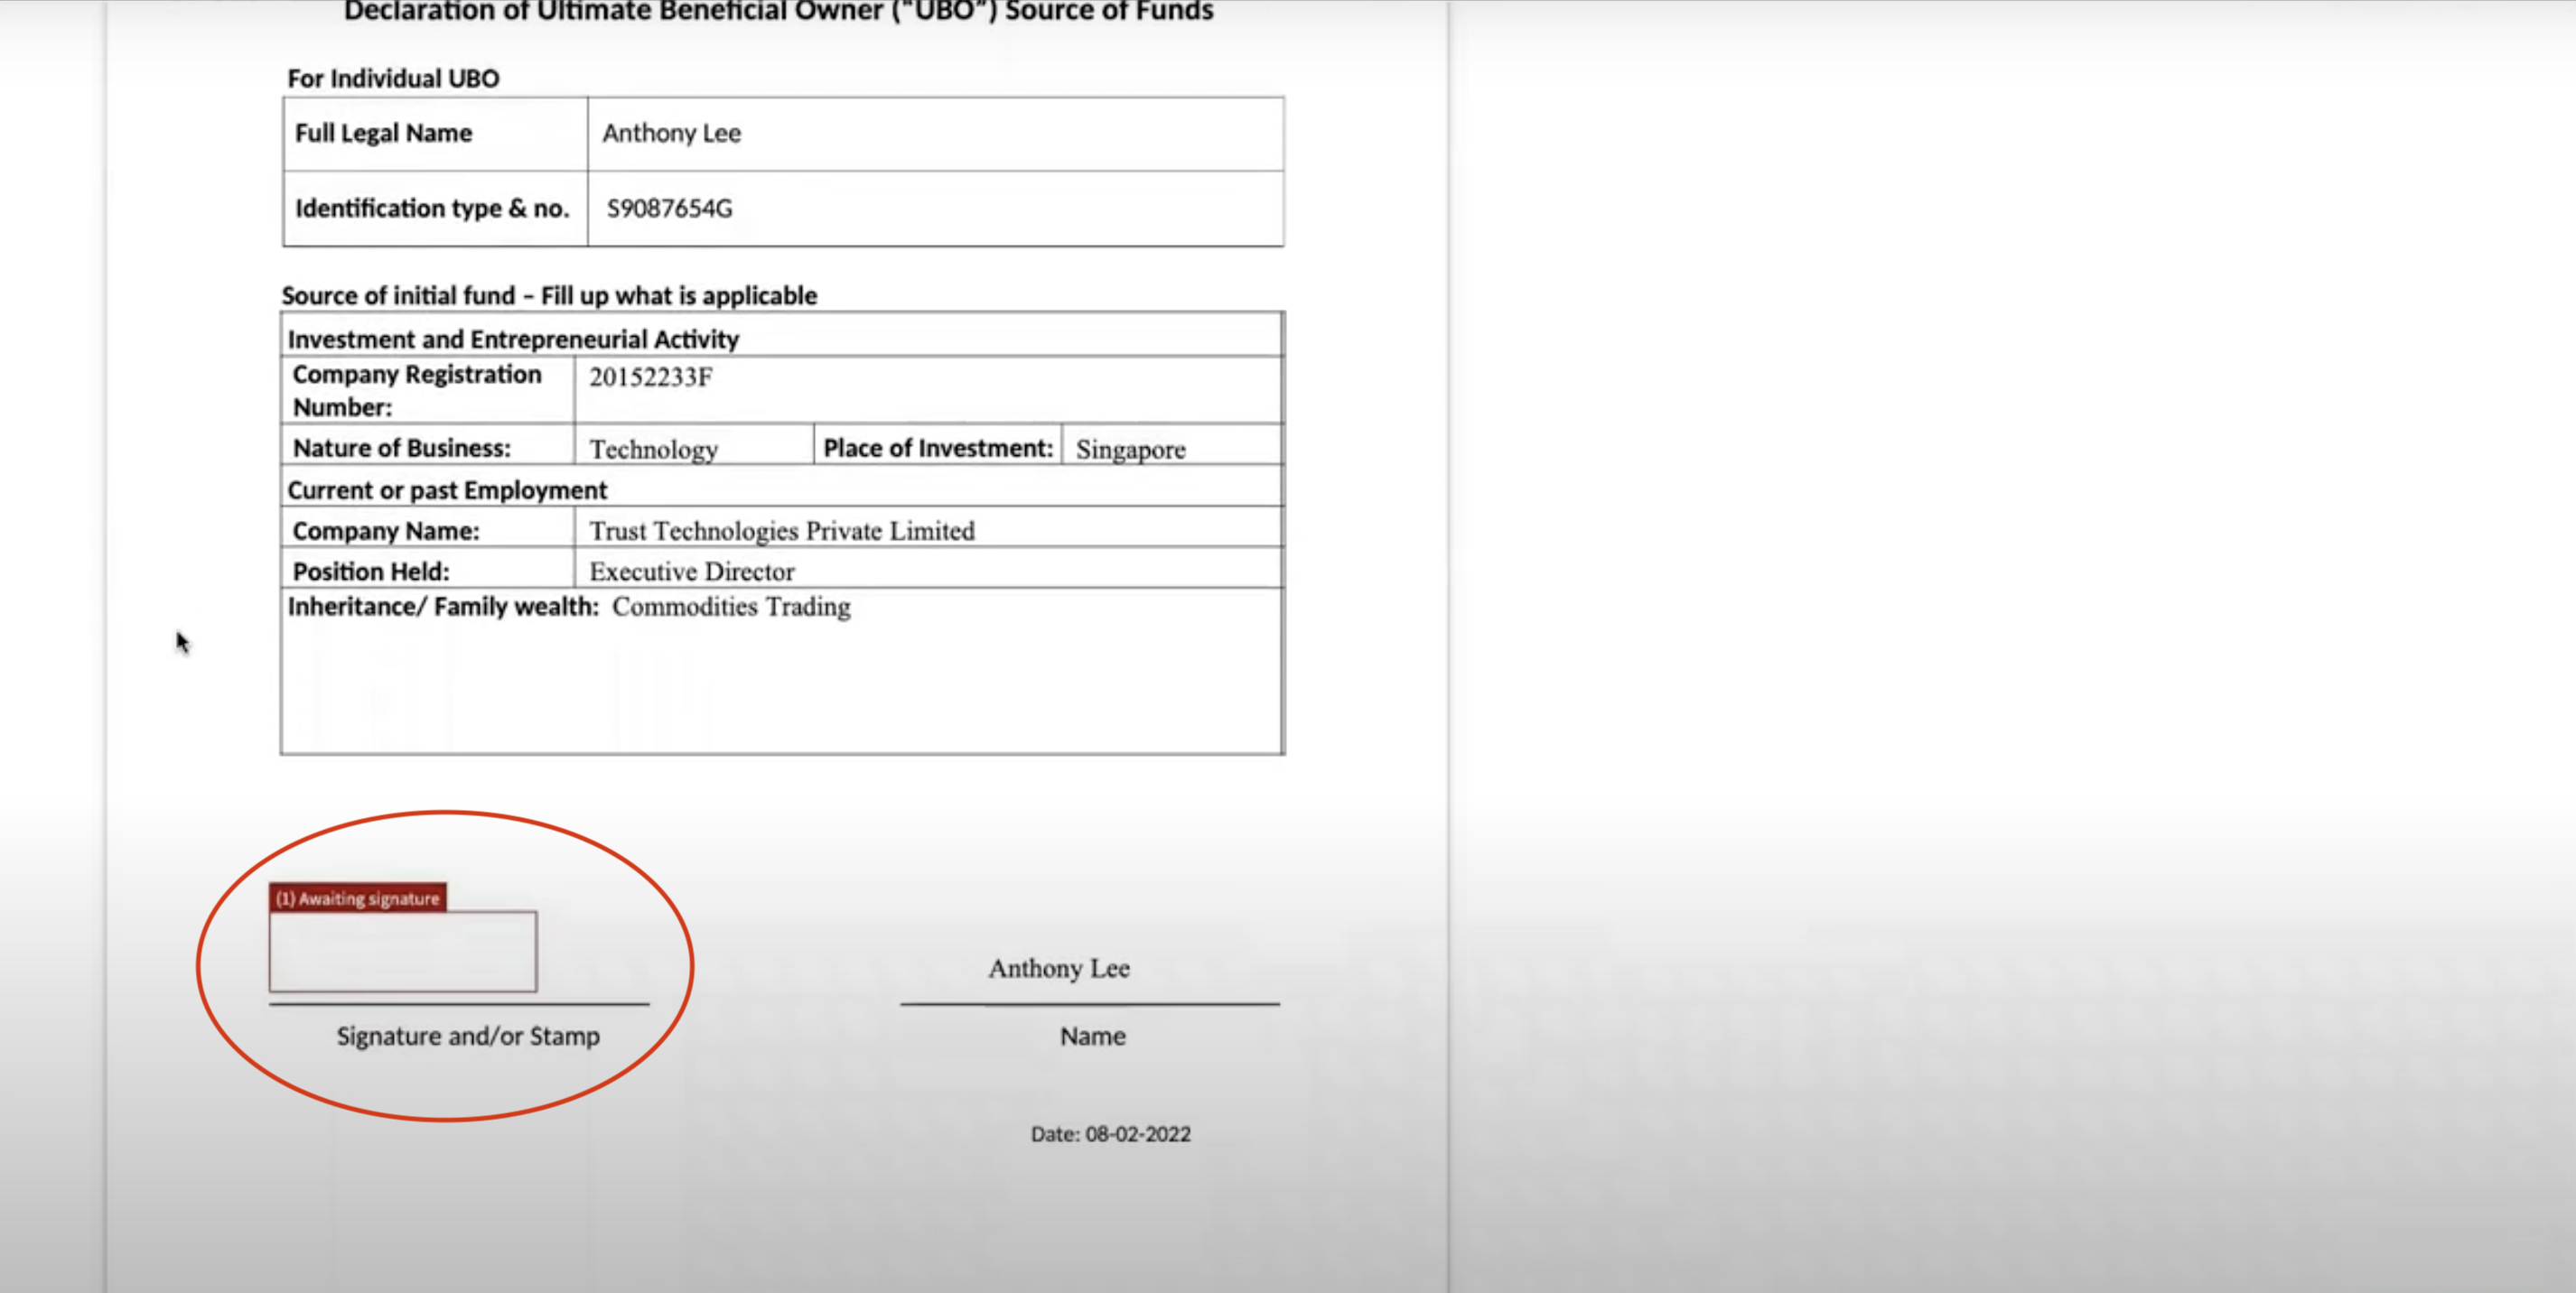
As part of your workflow, you can generate a document based on the fields completed in the forms.
To sign a document, simply click sign on the right of the document with a pen symbol next to it.
View the document and check through its details. If all the information is accurate and sufficient, then it’s ready to sign.
There will be a red box on the ‘signature and stamp’ line at the bottom of the page. Click on the red box. A window will pop up on the screen with three options for adding your signature:
- An ‘add signature’ option where you can sign via your mouse, trackpad, or screen if you’re on a smart device.
- An ‘upload file’ option, where you can upload a picture of your signature.
- A ‘Sign with Singpass’ option.
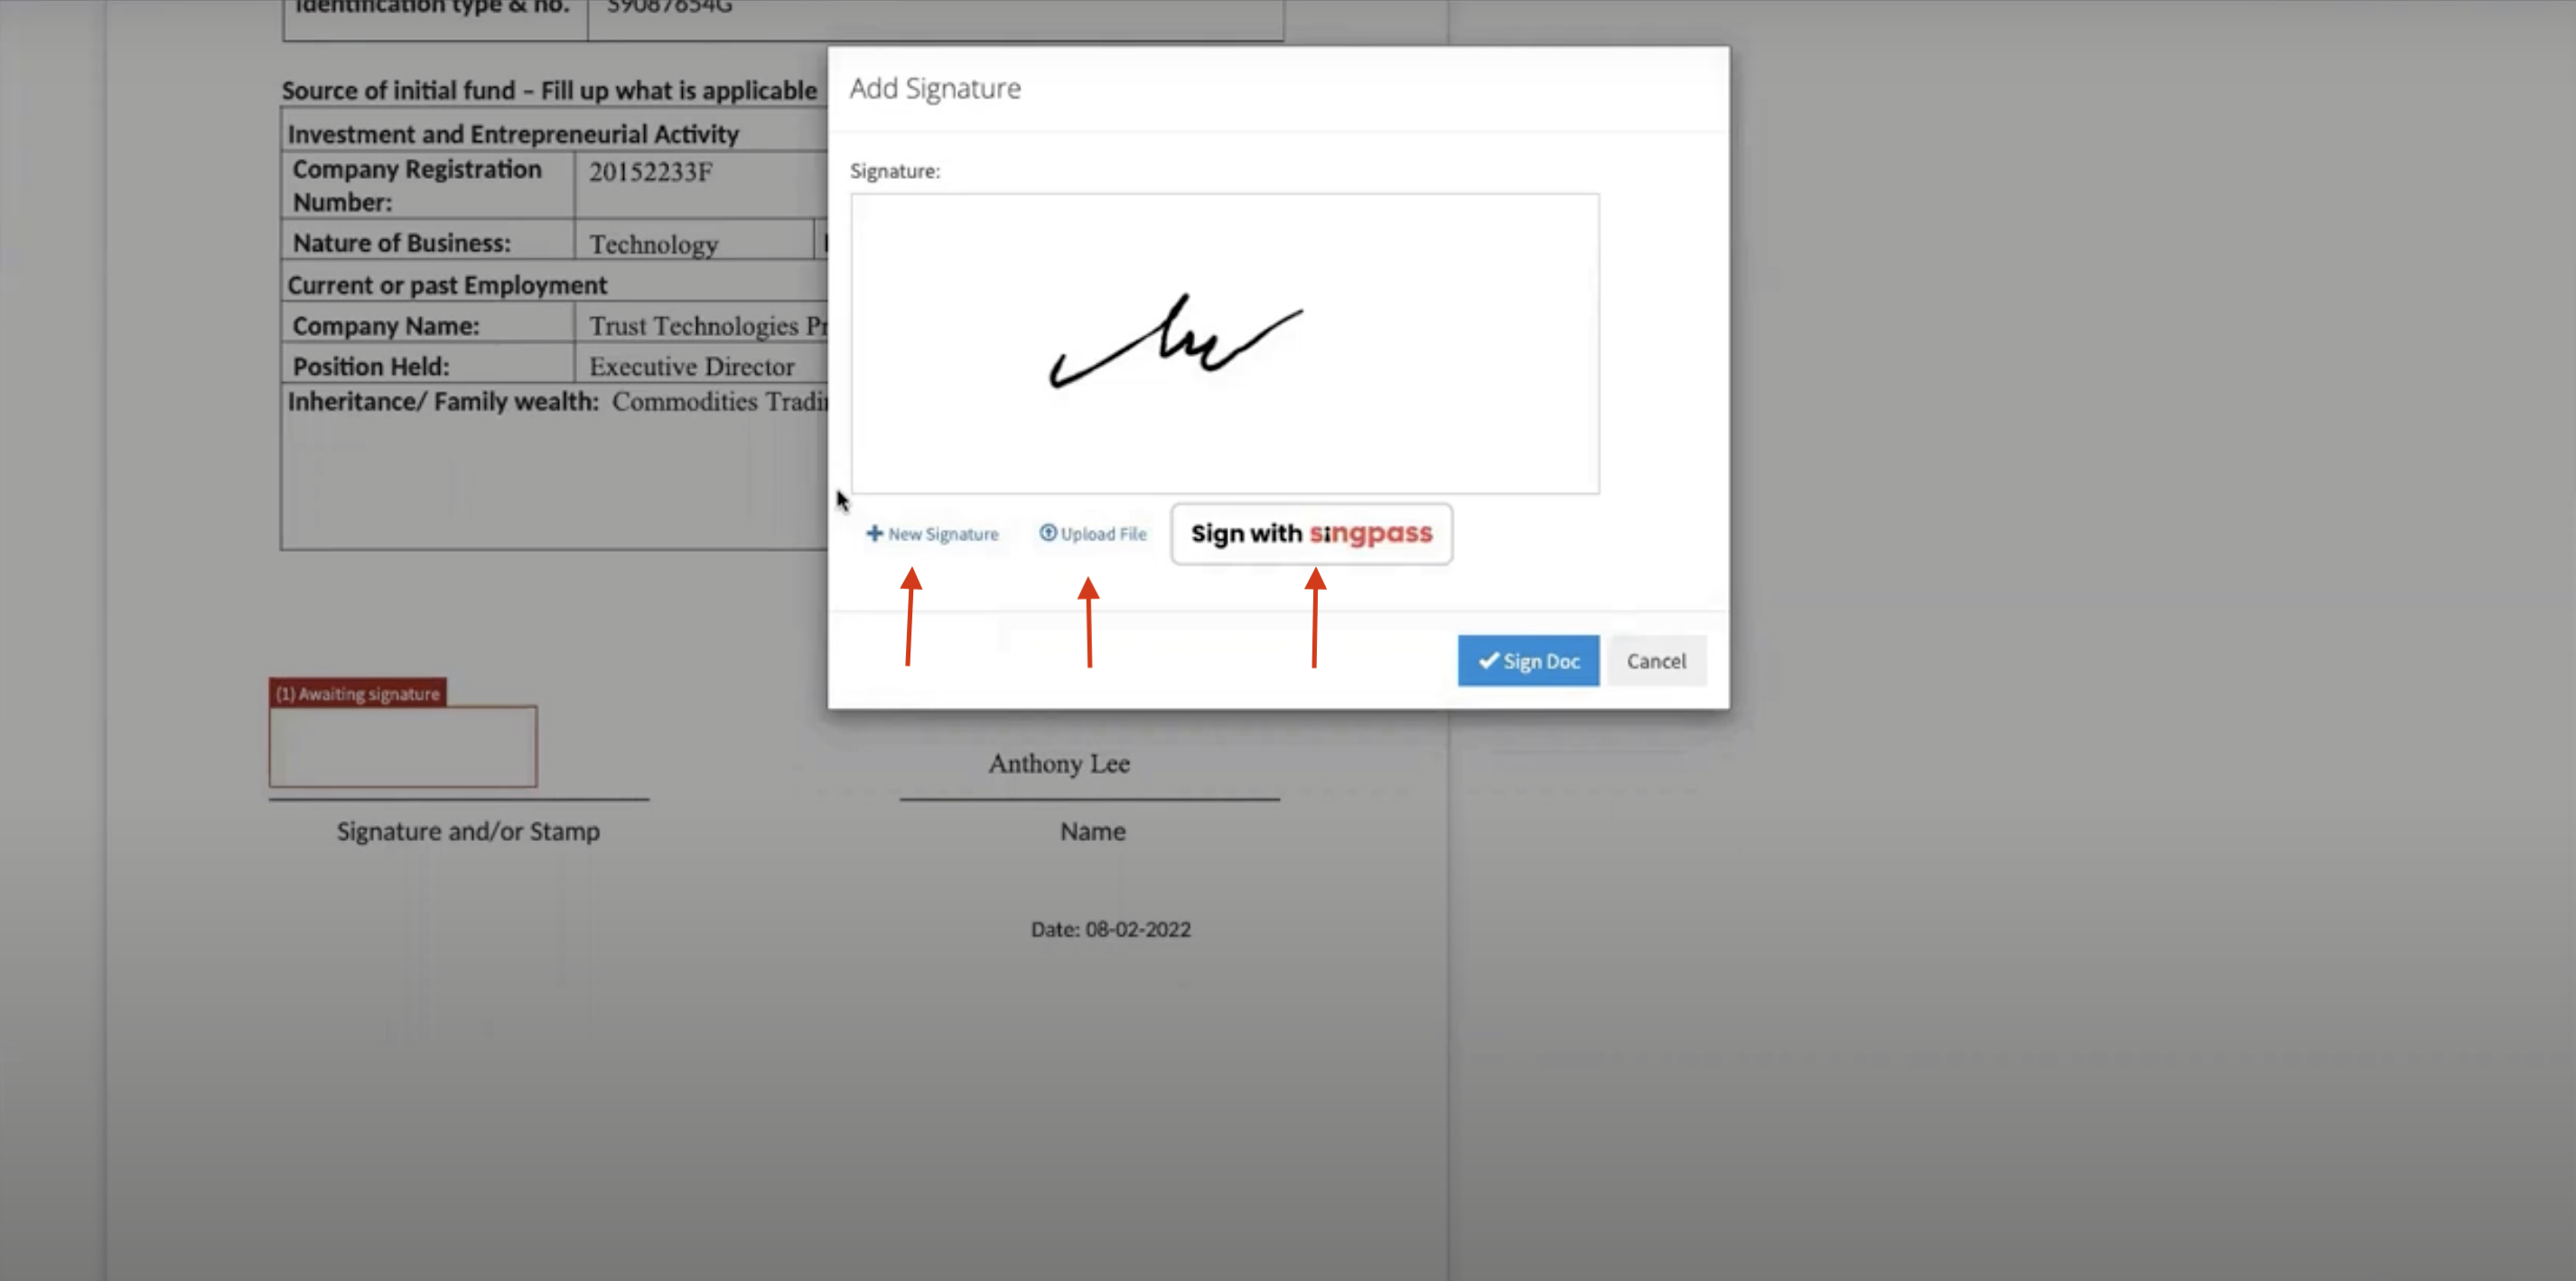
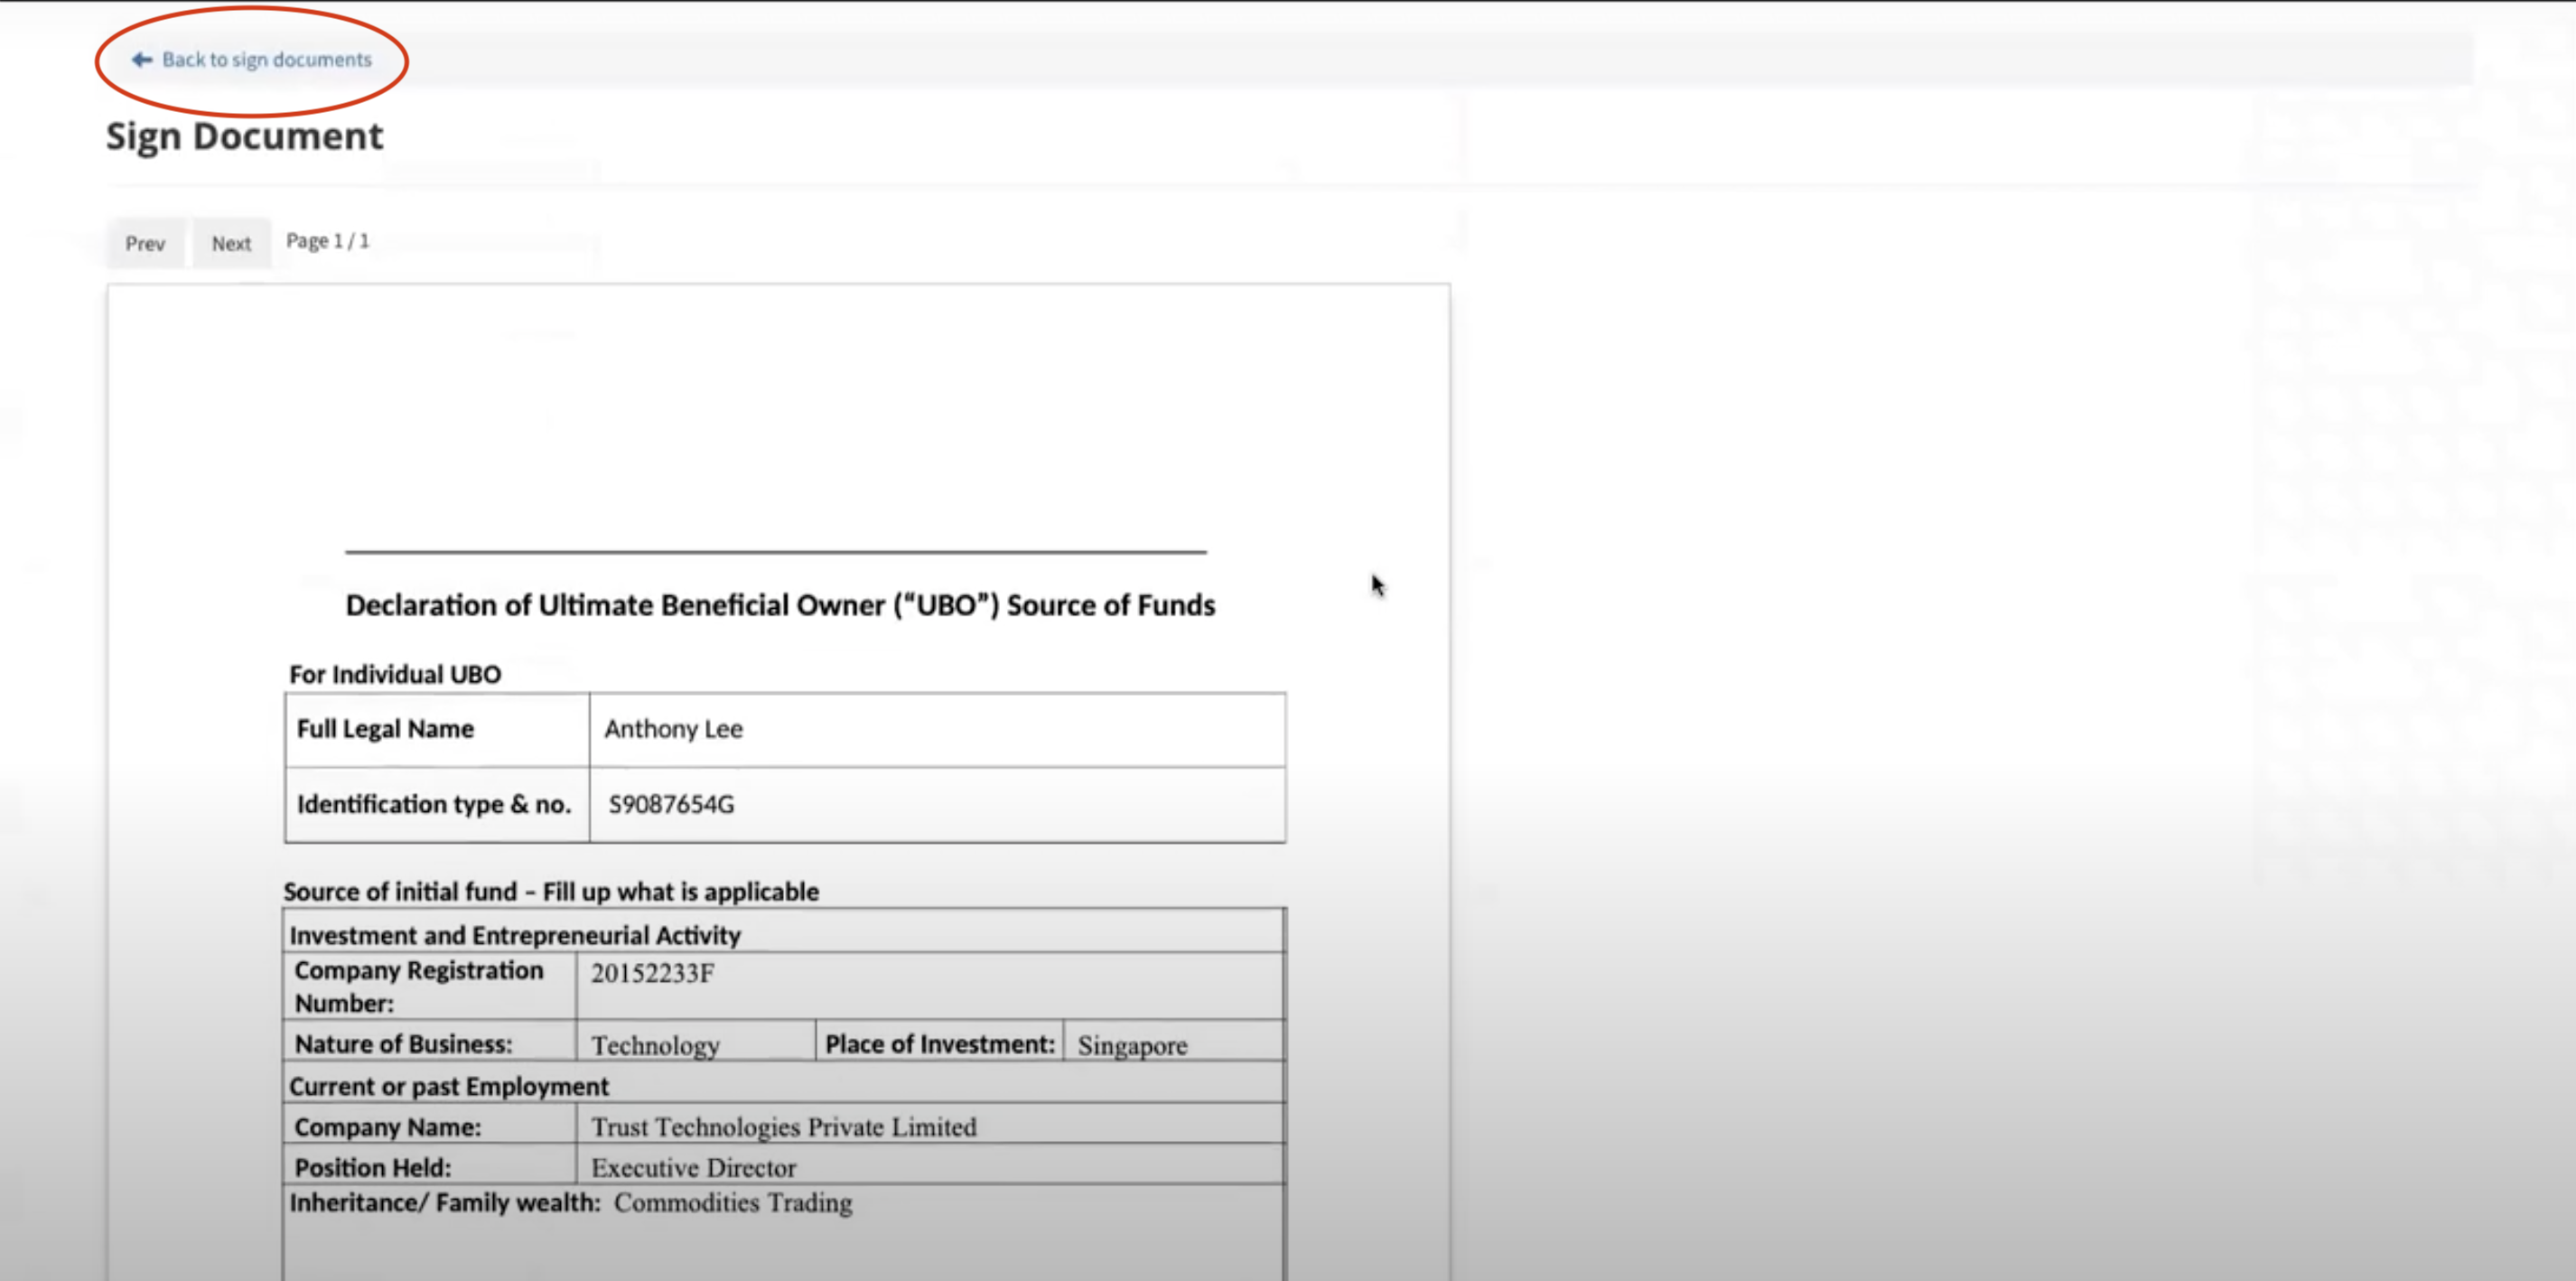
Once you’ve completed one of these options, simply click the blue sign document button on the bottom of the window, and the document will be signed. After this, you may click back to sign documents on the upper left side of the screen to sign any other documents that you might need to sign.
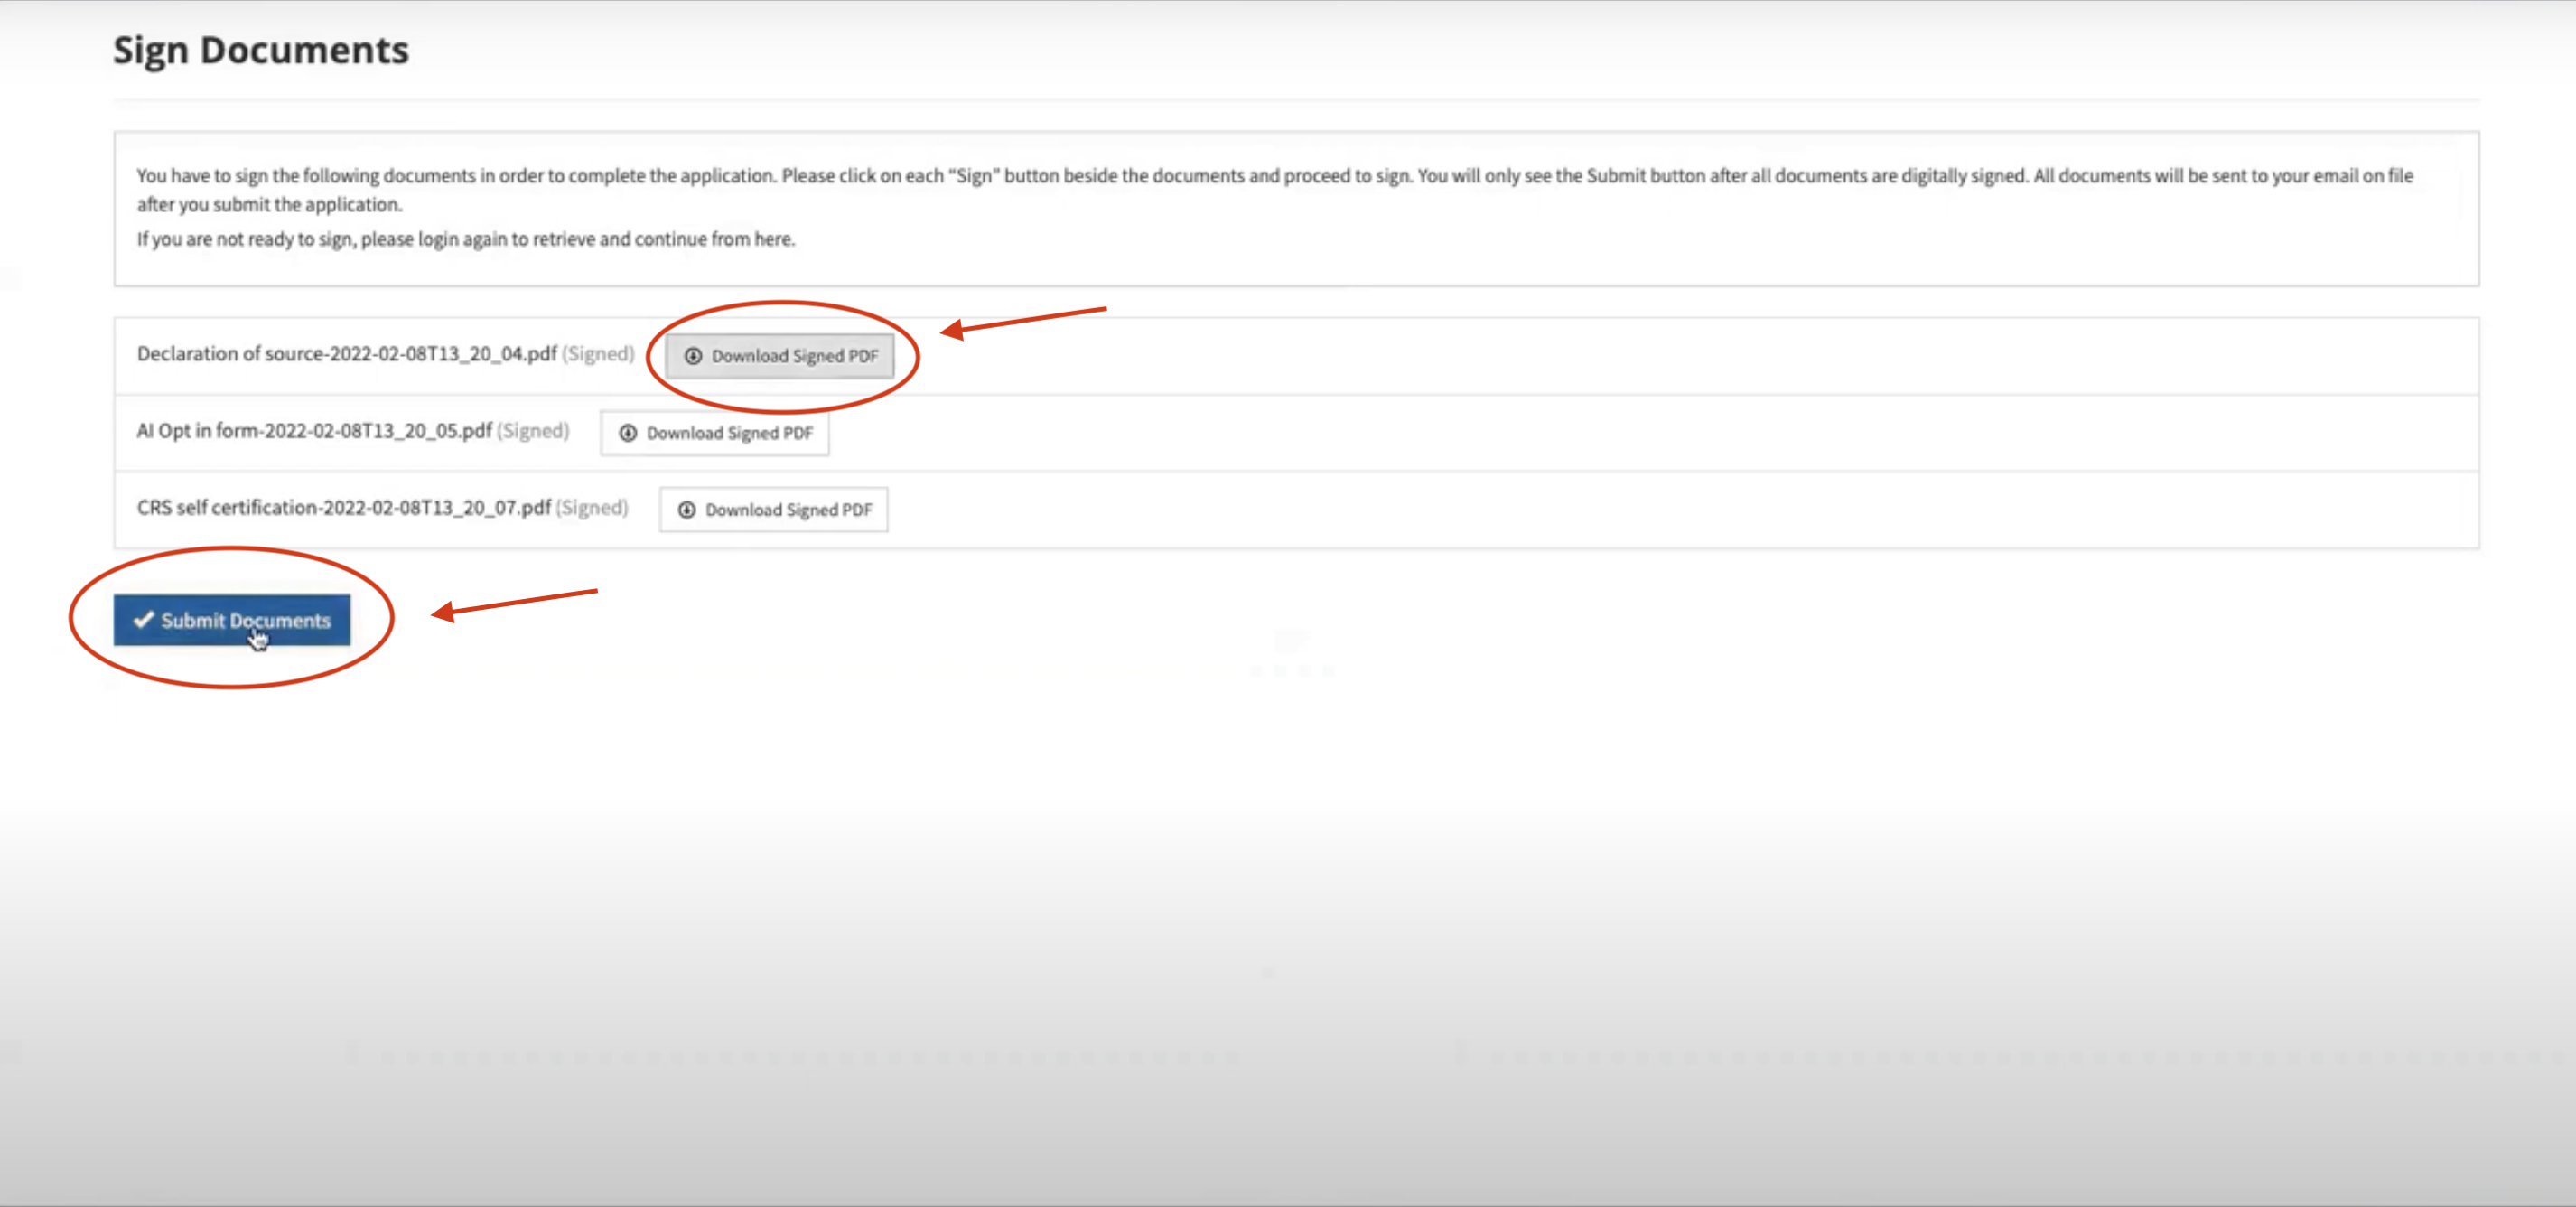
Any signed documents will now be available to download. To do so, simply click Download Signed PDF on any or all documents you’d like to download.
When all the documents have been signed, click the blue submit documents button that you can find below them.
Store and collect the data filled in the form onto Tessaract
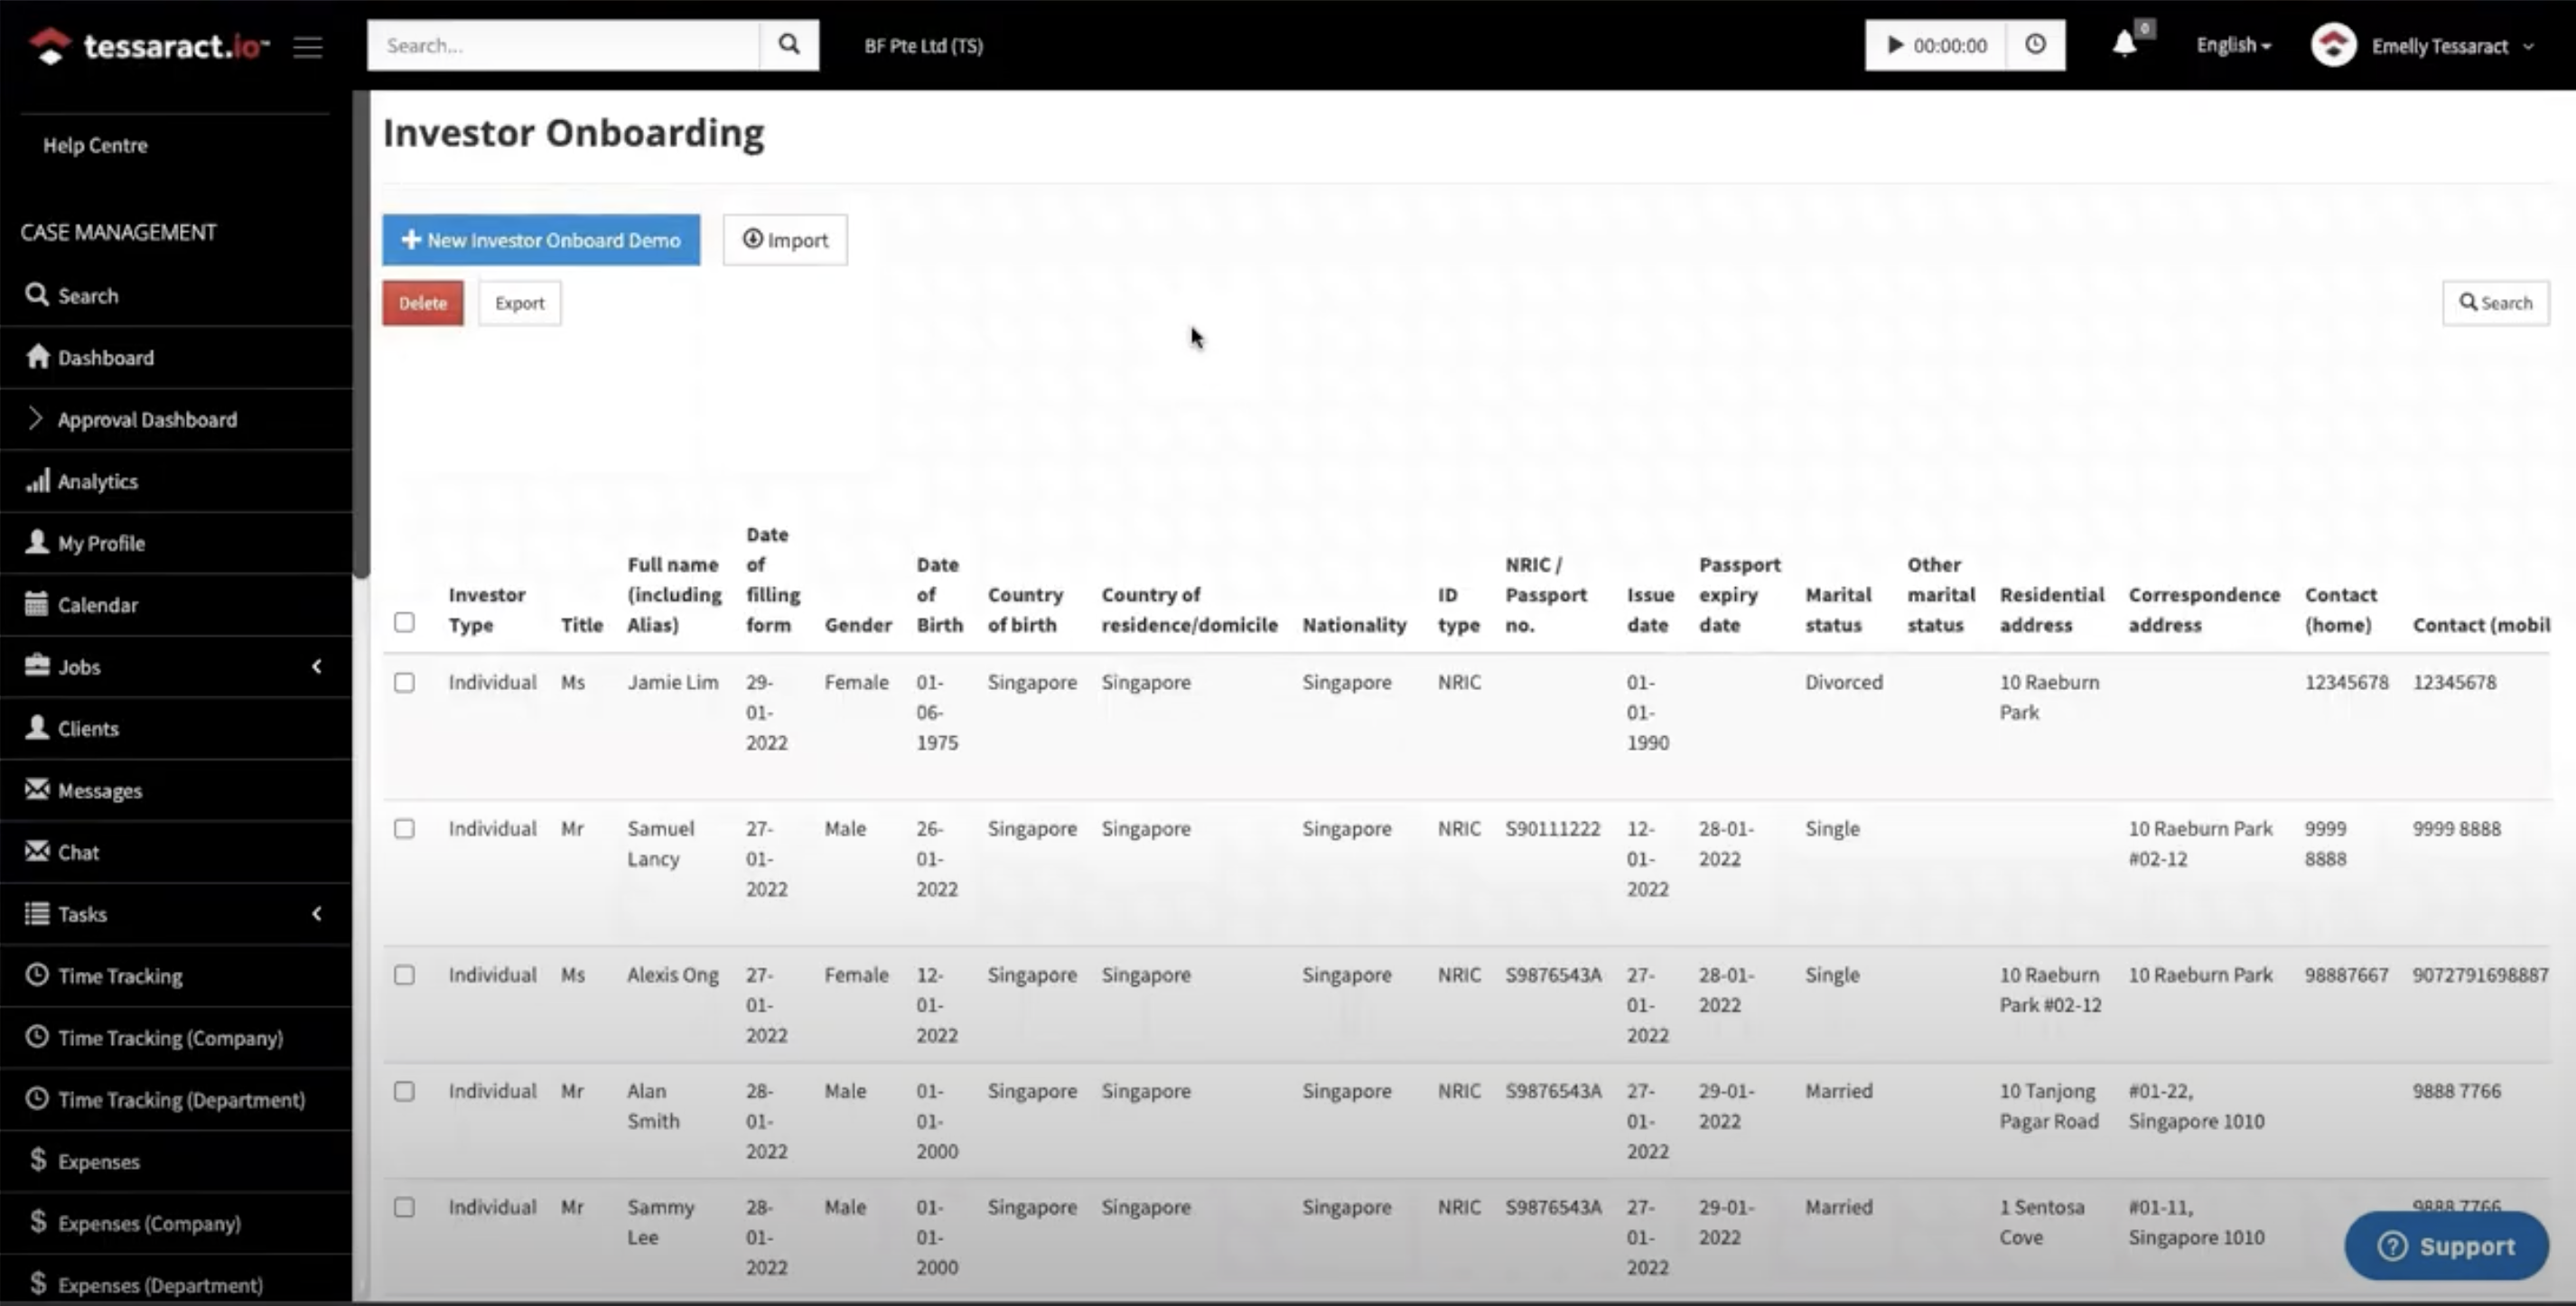
The signed documents that you’ve submitted will be available to you on Tessaract. For example, if the documents were investor onboarding documents, you’d find them under the ‘investor onboarding’ section of your dashboard.
You can view and edit the information that’s been filled into the various fields of the forms, as well as the attached signed documents at the bottom.
In under two minutes, you can create a form, send it for signing, and get the signed copies back, with all the information safely stored and easily accessible, all on Tessaract. To get a detailed narrative on how the start-end process of a custom digital form works, visit our Youtube Video. Additionally, check out our informative guides on how to prepare a document for digital signing on Tessaract, and how to digitally sign using your documents using Singpass to further maximise Tessaract's features.
Tessaract’s custom form builder module helps you customise and sign documents customised to your unique workflow so that you can make your processes more streamlined and effective.